Our favorite cupcakes. Maybe. It's hard to choose.
3 tbsp instant coffee granules
2 tbsp boiling water
4 eggs
3/4 cup buttermilk
1/2 cup + 2 tbsp Kahlua, divided
3 tbsp canola oil
2 tsp vanilla
1 1/2 cups flour
3/4 cup sugar (or equivalent Splenda plus 1/2 cup milk powder)
2/3 cup cocoa
1/2 cup brown sugar
1/4 tsp salt
1 tsp baking powder
1 tsp baking soda
1/4 tsp cinnamon
Frosting:
2 oz semisweet or dark chocolate, finely chopped
1 tbsp Kahlua
Milk
In a small bowl, dissolve coffee granules in water. In another larger bowl, beat the eggs, buttermilk, 1/2 cup Kahlua, oil, vanilla, and coffee mixture until blended thoroughly. Combine the dry ingredients and gradually combine the two mixtures. Beat thoroughly for fluffiness.
Pour into greased cupcake tins. Bake at 325 for 25 - 35 minutes until the cake springs back when gently touched. Cool for 10 minutes, then remove to a cooling rack. Cool for 15 minutes more, then brush with remaining Kahlua. Cool.
To make the frosting, combine the chocolate and Kahlua. Microwave for 10 seconds at a time until melted, stirring frequently. Add milk, a tiny bit at a time, until it reaches a spreading consistency. Remember that it will firm up as it cools. Spread over cupcakes.
Wednesday, May 9, 2012


Saturday, April 21, 2012
Avocado Bubble "Tea"
Bubble tea is a catch-all term for any drink that contains "bubbles", which are actually large, dark colored tapioca pearls. The Taiwanese word for these is Boba, and our use of Bubble is probably a corruption of this word. A shop selling bubble tea usually offers actual tea with bobas, but also usually offers smoothies with bobas, milk tea with bobas, and juice with bobas. The dark pearls are colored in a variety of ways, but the best ones are colored with purple potato and have a slightly sweet, molasses-y taste.
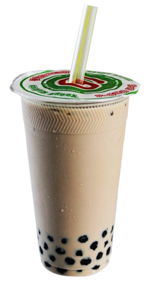
Making bubble tea at home has been a dream for a long time, since Ariel and I found a fantastic bubble tea shop in Seattle that uses real fruits for the smoothies instead of the more common flavored powders. It's called WOW, which stands for Wonder Of Worship, and is an Asian Christian hangout and board game den in addition to its bubble tea vending.
There's nothing like that within comfortable driving distance of us here in Stoneham. So, in case you're in the same boat, here's a bubble tea recipe. You can also just leave the bubbles out and have a smoothie.
Ingredients (per smoothie):
1 small ripe avocado
Milk, or milk alternative if dairy intolerant - I suggest coconut-almond milk
Sweetener to taste
3 drops vanilla extract, or more to taste
Ice cubes (optional)
Slice the avocado in half down to the pit. Twist the two halves apart and pop the pit out with a spoon; discard the pit. Hold each half in your hand and, using a blunt knife, slice the inner meat vertically and horizontally. Then scoop the meat out with a spoon. It will come out already nicely chopped.
Put the avocado meat into a small mixing bowl if you have an immersion blender, also known as a stick blender. If you don't have one, put it into the regular blender, and afterwards, go get an immersion blender ;) Add enough milk to just cover the avocado. You may need to add more later. Avocados are remarkably powerful thickeners.
Add a little sweetener. You can use any kind of sweetener, either natural or artificial. If you want to use natural, then I suggest half honey and half organic sugar. About a teaspoon of each to start with, you can always add more. Also add the vanilla.
Puree the mixture until smooth. You will be amazed at how velvety smooth the avocado makes it. Taste and add more sweetener if needed.
Next, either put in the fridge to chill, or add a few ice cubes and stir until it's at your desired temperature.
To make the bobas:
You will need to buy the right ones. Go online to Amazon and order the kind specially made for bubble tea. If you try to use regular tapioca, you will be disappointed! (Obviously, you will need to do this well in advance of making the smoothie!) Then, follow the directions to cook them. When they're done cooking, drain in a strainer, and put into a bowl of ice water to chill before adding them to your smoothie.
To drink a bubble tea, you will either need a jumbo bubble tea straw that is big enough to suck up the bobas, or you will need to use a spoon. Enjoy!
Monday, April 16, 2012
Delicious Blueberry Compote-slash-Syrup
This is great on pancakes, ice cream, angel cake, and as a topping to spice up less flavorful fruits like cantaloupe.
It is an excellent way to use frozen berries, which are much cheaper than fresh, and available year-round. They may also be more nutritious, since they haven't been sitting on a shelf, but instead were frozen and preserved right after being picked.

Ingredients:
1 bag frozen wild blueberries (about a pound)
1/4 tsp cinnamon
Sweetener to taste
Optional: Lemon zest, OR orange zest, OR 1/4 tsp orange oil
Place the blueberries and the cinnamon in a small pot over medium heat. No need to thaw the berries first. Cook and stir.
The berries will burst and give up a lot of juice. As long as you keep stirring, the berry syrup will become thicker and thicker. There is a "sweet spot" where the berry syrup has become concentrated and intensely flavorful, but hasn't become too thick or gritty from the seeds. Exactly how thick is up to you. Just keep spooning some out and looking at it. You will know when it's done because you will look at it and say "I wanna put that on my ice cream." (When it's too thin, you will look at it and say "Ick, that looks watery.")
Take it off the stove and add the sweetener at this time. It doesn't matter what kind you use, but do make sure it has cooled before you add nutrasweet (phenylalanine) if that's what you use. The flavor of the berries is strong enough to cover up the flavor of stevia if you choose to use it. How much you need will depend on the sweetness of the berries, which varies from bag to bag. Start with 1/4 cup (or equivalent) and taste.
If you chose to use the zest or flavoring, add it now.
NEXT: Some people like this as a compote, which means there are whole berries floating in a relatively thin syrup, while other people like it better as a thick syrup with no chunks, ie. a smooth puree. I like puree, Ariel likes chunks, so I puree half of it and then store the results in separate jars.
Note that this syrup is different from store-bought in that it has no preservatives. This will keep for only 2-3 days in the fridge. If you want it to keep for longer, then take it out every day or two and bring it to a boil, then cool and return to the fridge. Every time you boil it, you stop the bacteria and yeast from growing, and reset the shelf life.
WHY AND WHEREFORE:
Why wild blueberries? They are higher in antioxidants and have a stronger flavor, and are a little more tart, which I like. They are also a little more expensive, so feel free to use regular blueberries if the wild ones are too pricey.
Why cinnamon and citrus? That's just the traditional "berry cobbler" combo. You can also use 1/4 - 1/2 tsp almond flavoring, which is sophisticated and a nice treat. Also, you can include other berries, such as blackberries, to make a more complex flavor. Ginger and lemon is another fun twist. I haven't tried it, but I have seen fruit recipes that use 1/4 cup of zinfandel wine, too.
It is an excellent way to use frozen berries, which are much cheaper than fresh, and available year-round. They may also be more nutritious, since they haven't been sitting on a shelf, but instead were frozen and preserved right after being picked.
Ingredients:
1 bag frozen wild blueberries (about a pound)
1/4 tsp cinnamon
Sweetener to taste
Optional: Lemon zest, OR orange zest, OR 1/4 tsp orange oil
Place the blueberries and the cinnamon in a small pot over medium heat. No need to thaw the berries first. Cook and stir.
The berries will burst and give up a lot of juice. As long as you keep stirring, the berry syrup will become thicker and thicker. There is a "sweet spot" where the berry syrup has become concentrated and intensely flavorful, but hasn't become too thick or gritty from the seeds. Exactly how thick is up to you. Just keep spooning some out and looking at it. You will know when it's done because you will look at it and say "I wanna put that on my ice cream." (When it's too thin, you will look at it and say "Ick, that looks watery.")
Take it off the stove and add the sweetener at this time. It doesn't matter what kind you use, but do make sure it has cooled before you add nutrasweet (phenylalanine) if that's what you use. The flavor of the berries is strong enough to cover up the flavor of stevia if you choose to use it. How much you need will depend on the sweetness of the berries, which varies from bag to bag. Start with 1/4 cup (or equivalent) and taste.
If you chose to use the zest or flavoring, add it now.
NEXT: Some people like this as a compote, which means there are whole berries floating in a relatively thin syrup, while other people like it better as a thick syrup with no chunks, ie. a smooth puree. I like puree, Ariel likes chunks, so I puree half of it and then store the results in separate jars.
Note that this syrup is different from store-bought in that it has no preservatives. This will keep for only 2-3 days in the fridge. If you want it to keep for longer, then take it out every day or two and bring it to a boil, then cool and return to the fridge. Every time you boil it, you stop the bacteria and yeast from growing, and reset the shelf life.
WHY AND WHEREFORE:
Why wild blueberries? They are higher in antioxidants and have a stronger flavor, and are a little more tart, which I like. They are also a little more expensive, so feel free to use regular blueberries if the wild ones are too pricey.
Why cinnamon and citrus? That's just the traditional "berry cobbler" combo. You can also use 1/4 - 1/2 tsp almond flavoring, which is sophisticated and a nice treat. Also, you can include other berries, such as blackberries, to make a more complex flavor. Ginger and lemon is another fun twist. I haven't tried it, but I have seen fruit recipes that use 1/4 cup of zinfandel wine, too.
Wednesday, March 14, 2012
Thickening Sauces
Sauces are jewelry of the kitchen wardrobe. But a sauce isn't usually very useful unless it is thick enough to cling to the food, and so it is necessary to thicken most sauces in some way. Here's a rundown of ways to do this, and keep in mind it works to thicken other things, too.
1. Starch powder: The most obvious method is to use a powdered starch like flour. Cornstarch, arrowroot, and tapioca all work, too, the main difference being that flour is cloudy whereas those other three are clear.
To thicken with starch, you must whisk the starch into a cool liquid, you cannot whisk it into a hot liquid or it will clump.
Alternatively, you can make a paste (also called a roux) using the flour and a small amount of either melted fat or water, and gradually, carefully whisk the rest of the liquid in a bit at a time. This is ideal when you want to cook the flour a little to make it develop flavor, but is not recommended for other starches.
One last way to incorporate it is to sprinkle it atop dry vegetables or meats while they are sauteeing. The flour clings to the veggies instead of clumping, and you can add the rest of the liquid all at once without worry.
Advantages: Readily available, foolproof if you follow directions
Disadvantages: Adds little or no flavor, adds carbs
Additional properties: Flour-thickened sauces get thicker as they cool, but cornstarch-thickened sauces tend to get thinner. Very stable once cooked and won't curdle, but might scorch.
2. Egg: Eggs, either whole or just the yolk, thicken any liquid into a rich and silky custard. The obvious use is for ice cream and custard sauce, but eggs can also be used to thicken mustard sauce and wine sauce to excellent effect.
The big problem is overcooking and curdling. Avoid this by heating the liquid to a boil, and then gradually whisking the liquid into the eggs (in a separate bowl), not the other way around. If necessary, return to the heat and cook a little longer, but stop instantly if the liquid begins to look clumpy. To rescue a clumpy sauce, put it into the blender and puree. It will be thinner but the clumps will go away.
Advantages: Delicious flavor and richness, adds nutrition
Disadvantages: Adds fat and cholesterol, adds allergens (eggs are allergenic), easy to mess up
Additional properties: Tends to gel slightly while it cools. Unstable, may curdle easily.
3. Onions: Onions will cook down into a pulp when simmered for a long time. This is most useful in stews. Use enough onions, and you will not need to thicken your stew with flour at all; it will make a delicious thick broth on its own.
Advantages: Extremely flavorful, healthy (it's a veggie!), non-allergenic for most people
Disadvantages: Takes a long time, not practical for anything but stew and tagine
Additional properties: Very stable. Won't curdle or change texture.
4. Pureed vegetables: Many cooked veggies can be pureed and added to sauces, or used as a sauce. The best are carrots, cauliflower, potatoes, and coconut milk (which is pureed coconut).
Wednesday, February 29, 2012
THE ULTIMATE CHEESEBURGER PIZZA
Requires capslock.
A note on ingredients: When trying to make take-out or fast food at home, don't spend too much on fancy ingredients. Use cheap mustard and store brand cheese, that sort of thing. If you use anything fancy and expensive, it just won't taste right. It might still be good, but it won't be right. For example, when making chicken pot pie, you must use frozen vegetables, and when making regular pizza, you must use canned store brand pizza sauce and store brand mozzarella. In this case, you will need to use cheap yellow mustard like you would find at a hot dog stand.
Ingredients for the crust:
1/3 cup cornstarch
1/2 cup yellow cornmeal
About 1 cup white whole wheat flour
2 tbsp melted butter or margarine
1 envelope (2 1/2 tsp) regular bread yeast
1/2 tsp salt
1/2 tsp garlic powder
3/4 cup warm water, about 115°
Toppings:
3 strips bacon
1/3 lb lean ground beef
4 plum tomatoes
Shredded cheese (I like Colby or other mild cheddar, most people will prefer American; the volume is up to you, start with 2 cups)
1/2 cup finely chopped onion
1 cup finely shredded lettuce
3 dill pickles spears
Ketchup and mustard
To make the crust, combine the cornstarch, cornmeal, salt, and garlic in a bowl along with 1/2 cup whole wheat flour. In a separate bowl, combine the water and the yeast.
Add the water and the melted margarine to the flour mixture and stir vigorously for 1 minute. Gradually stir in more whole wheat flour until a dough forms. Turn the dough out onto a floured surface and knead gently, adding more flour to keep it from sticking, for 4 minutes. Be gentle (but firm) since the dough has very little gluten, due to the corn, and will tear easily.
Roll the dough out to an oblong about 18 inches across. Rolling it bigger makes a thinner crust, smaller makes a thicker crust. Transfer to a well-greased baking sheet that is heat-safe to 500 degrees. This means NOT a non-stick sheet. No non-stick sheet is safe at this temperature! Use a double layer of tinfoil instead if you don't have any heat-safe baking sheets. Then use your fingers to "squish" in the edges of the crust, mounding them up to be thicker. Let rest while you prepare everything else.
Begin pre-heating the oven to 500 or as high as your oven goes. Heat a skillet over medium-high heat and fry the bacon until crisp. Remove to a plate, and pour out the drippings. Crumble the beef into the same pan and cook until done, stirring. Keep warm.
To prepare the tomatoes, cut off their tops, then cut in half width-wise. Use a spoon to scoop the seeds out and discard them. Then chop the tomatoes into diced bits about 1/4 to 1/2 inch in size. To prepare the pickles, cut out the seeds from the center of the pickle spears and discard. Then mince the rest of the pickle.
If the oven is hot, and the pizza crust has risen somewhat, you can begin to cook it. Spread the tomato bits over the crust and bake it for 7 minutes or until the edges just begin to turn a little golden.
Remove the crust from the oven and top with the shredded cheese. Return it to the oven and bake again, for 5 minutes this time. Check the pizza. If the cheese is beginning to brown, it's done. If not, bake another minute.
When it's done baking, apply the remaining toppings in this order: meat first, then onions, pickles, and lettuce. You can drizzle the ketchup and mustard over the whole thing yourself or, like I did, just put the ketchup and mustard squeeze-bottles on the table for people to serve themselves since some people like more mustard than others.
Saturday, February 25, 2012
Brown Rice Pudding with Brandy
Out of the blue, I acquired a craving for rice pudding. I insisted on brown rice for health purposes.
I've read that it's better to pre-cook the brown rice in water and then add it to the milk; I haven't tried this yet, so here's the traditional recipe.
Ingredients:
2/3 cup brown rice, uncooked
Optional: 1/4 cup golden raisins
3 cups milk
1/4 tsp cinnamon
1/4 tsp fresh ground nutmeg
3 tbsp butter or margarine
1 tbsp brandy
1 tsp vanilla
1/2 cup splenda or equivalent sweetness
Combine the rice, milk, cinnamon, and nutmeg in a small pot. Bring to a low boil, then turn down the heat and simmer gently. Cook, stirring frequently, for 45-60 minutes or until the pudding thickens to your preferred texture.
Add the brandy. Whisk in the butter, a tablespoon at a time. Then continue to cook, stirring constantly since it will burn easily at this point, until the alcohol from the brandy has evaporated. You can tell because the steam will stop smelling like booze.
Stir in the splenda and vanilla.
If you don't serve it immediately, this will thicken as it cools. It will also acquire a skin. To prevent this, place a sheet of plastic wrap directly onto the surface of the pudding.
Note on butter: The reason for the butter and the brandy is to cover up the bitter bite of the brown rice. I personally don't like the taste of brown rice on its own. The fat from the butter tempers bitterness, and whatever shines through anyway is swallowed up by the brandy. Spiced rum would also be tasty. I made this with 2% milk, so it's possible that using whole milk would not need butter.
Note on milk: You cannot substitute rice, almond, or soy milk effectively in this recipe. Soy milk will produce a runny pudding, though still edible; rice milk will not set at all but stay liquid like congee. I think, however, that the newly available coconut milk (not the kind in a can, the kind you buy in the milk department) might work well.
Next, I think I'll try this with wheat berries, or maybe farro!
Sunday, February 19, 2012
Kabocha Squash Pie
I made this without a crust, so it's more like a flan than a pie, but you can make it with a crust. I recommend this crust: Flaky Tender Pie Crust
Kabocha squash is also known as a Japanese pumpkin. It doesn't look like a pumpkin, since it's green and flattened instead of round, but its flesh is orange and very smooth and sweet. In my opinion, kabocha is better than pumpkin if you are preparing a pumpkin recipe from a fresh vegetable instead of canned puree. Fresh pumpkins are irregular and often underripe, watery, or stringy; kabocha squashes are almost always sweet and fine-textured, and taste very similar to pumpkin. This is a Pumpkin pie recipe at heart.
Ingredients:
1 kabocha squash

Kabocha squash
3 eggs
1 can evaporated milk
2/3 cup Splenda or equivalent sweetness
1 tbsp dark corn syrup (optional if you don't have it)
1 tsp cinnamon
1/2 tsp allspice
1 tsp vanilla
To prepare the squash, cut it in half from top to bottom, and scoop out the seeds and guts with a large metal spoon. (Metal so that the hard edges can scrape it out.) Place cut-side-down on a baking sheet or plate, and roast at 400 until it's very tender, about 45 minutes but don't skimp - it won't overcook.
Turn the oven down to 325 and remove the squash. Scoop out the orange flesh and put in a large bowl. If there is a greenish, less-ripe layer under the skin of the squash, don't use it. Usually there is more than enough meat on one of these squashes that you can afford to be picky.
Add all the remaining ingredients and beat well with a spoon. If you have an immersion blender, this is a good time to use it. Don't use a food processor or blender, though, since that whips in too much air.
Spray a pie plate with cooking spray or rub with butter. Pour the filling into the pie plate and put in the oven. Cook for 30 minutes or until the filling is set. If it puffs up, you've overcooked it so take it out right away. It might be a little watery but it will still be very delicious so don't worry.
This can also be made with less seasoning and no Splenda, for a side dish you can serve at dinner instead of for dessert. It's delicious, easy and healthy.
Kabocha squash is also known as a Japanese pumpkin. It doesn't look like a pumpkin, since it's green and flattened instead of round, but its flesh is orange and very smooth and sweet. In my opinion, kabocha is better than pumpkin if you are preparing a pumpkin recipe from a fresh vegetable instead of canned puree. Fresh pumpkins are irregular and often underripe, watery, or stringy; kabocha squashes are almost always sweet and fine-textured, and taste very similar to pumpkin. This is a Pumpkin pie recipe at heart.
Ingredients:
1 kabocha squash
Kabocha squash
3 eggs
1 can evaporated milk
2/3 cup Splenda or equivalent sweetness
1 tbsp dark corn syrup (optional if you don't have it)
1 tsp cinnamon
1/2 tsp allspice
1 tsp vanilla
To prepare the squash, cut it in half from top to bottom, and scoop out the seeds and guts with a large metal spoon. (Metal so that the hard edges can scrape it out.) Place cut-side-down on a baking sheet or plate, and roast at 400 until it's very tender, about 45 minutes but don't skimp - it won't overcook.
Turn the oven down to 325 and remove the squash. Scoop out the orange flesh and put in a large bowl. If there is a greenish, less-ripe layer under the skin of the squash, don't use it. Usually there is more than enough meat on one of these squashes that you can afford to be picky.
Add all the remaining ingredients and beat well with a spoon. If you have an immersion blender, this is a good time to use it. Don't use a food processor or blender, though, since that whips in too much air.
Spray a pie plate with cooking spray or rub with butter. Pour the filling into the pie plate and put in the oven. Cook for 30 minutes or until the filling is set. If it puffs up, you've overcooked it so take it out right away. It might be a little watery but it will still be very delicious so don't worry.
This can also be made with less seasoning and no Splenda, for a side dish you can serve at dinner instead of for dessert. It's delicious, easy and healthy.
Subscribe to:
Posts (Atom)