I am a huge fan of Scottish oatmeal, which has a texture halfway between grits and rice cereal but ten times as much flavor. But it takes ten minutes to cook, whereas quick oats take only 5, and some mornings that really makes a difference. Also, the texture, being soft, is less interesting than rolled oats, and sometimes I have trouble eating when all my food is the same soft texture (I know, I'm fussy).
Problem with regular quick oatmeal is, it's gooey and gross. I have been known to describe it as a "bowl of grayish sludge". It's also less flavorful than steel-cut or Scottish oatmeal.
So, if you want the speed and textural contrast of quick oats WITHOUT the gooiness, WITHOUT too much compromising on flavor... I have the recipe for you.
Two servings:
1 cup rolled oats
1 1/2 cup water or milk
Cinnamon, butter or margarine, and brown sugar to taste
Place the oats in a small saucepan, all by themselves. Turn the heat to medium-high and toast, stirring often, until the tiny broken oat fragments or oat dust on the bottom of the pan begin to turn golden and the oats smell toasty. This only takes a minute or two.
Add the water and stir quickly. It will steam and boil hotly for a few seconds, then subside.
Turn the heat down to medium-low and put a lid on the pan. Let sit 3 minutes.
Turn off the burner. Add the cinnamon and sugar and butter if you are using them. Stir once, gently, and replace the lid for 2 more minutes.
You will see that the oats have steamed like rice and have held their shape without getting mooshy. Fluff up and serve.
To store for later, fluff up first so they don't get too compacted, then store in a container with a tight lid.
I'm going to get a rice cooker and try using it to make oatmeal next!
Showing posts with label vegetarian. Show all posts
Showing posts with label vegetarian. Show all posts
Tuesday, April 29, 2014


Monday, February 10, 2014
Spaghetti Pizza Pie
Like Pizza but MORE AWESOME. Also healthier, and super easy to make.
Ingredients:
3 cups cooked spaghetti, tossed with a bit of butter or olive oil
3 eggs
1/2 cup grated parmesan
1/4 tsp salt
1 tsp garlic paste, or powdered or minced garlic to taste
1/2 tsp dried oregano
1/2 tsp dried parsley
2/3 cup marinara sauce
1 cup shredded mozzarella or pizza blend
1 tomato, seeded and chopped
Turn oven to 400. Butter a pie plate and place in the oven while it preheats.
Combine spaghetti, eggs, parmesan, garlic, salt, and herbs in a large mixing bowl.
When the oven is heated, take the plate out and pour the spaghetti mixture in. Spread out so that the edges are a little higher than the middle, forming a bit of a crust.
Spread the tomato sauce in the middle, leaving a 1/2 inch crust. Top with cheese, then tomatoes.
Bake for 25 minutes or until golden and bubbly. Slice and serve! It's good with salad :)
Ingredients:
3 cups cooked spaghetti, tossed with a bit of butter or olive oil
3 eggs
1/2 cup grated parmesan
1/4 tsp salt
1 tsp garlic paste, or powdered or minced garlic to taste
1/2 tsp dried oregano
1/2 tsp dried parsley
2/3 cup marinara sauce
1 cup shredded mozzarella or pizza blend
1 tomato, seeded and chopped
Turn oven to 400. Butter a pie plate and place in the oven while it preheats.
Combine spaghetti, eggs, parmesan, garlic, salt, and herbs in a large mixing bowl.
When the oven is heated, take the plate out and pour the spaghetti mixture in. Spread out so that the edges are a little higher than the middle, forming a bit of a crust.
Spread the tomato sauce in the middle, leaving a 1/2 inch crust. Top with cheese, then tomatoes.
Bake for 25 minutes or until golden and bubbly. Slice and serve! It's good with salad :)
Wednesday, January 29, 2014
Grain Hipster Pizza Dough
I've arrived at an AWESOME PIZZA CRUST. It is flavorful, soft and tender, but with a nice texture. Start making it an hour before you want to eat it.
Ingredients:
1 cup warm water (about 110 degrees)
2 1/2 tsp yeast (1 packet yeast)
1 tbsp sugar
1 cup oat flour
1/3 cup wheat germ
1 tsp salt
1 tbsp olive oil
2 tsp vital wheat gluten
Bread flour
Stir the sugar and yeast into the water and set aside for 5 minutes while it foams.
Combine the oat flour, wheat germ, salt, gluten, and 1 cup bread flour in a bowl. Add the olive oil and stir in the water mixture.
Beat with a spoon for 2 minutes, vigorously. You can use a machine for this if you have one.
Turn out onto an amply floured surface and knead for 5 minutes. Add plenty of bread flour as needed to keep it from sticking. You'll end up adding maybe another cup of flour. The final dough will be soft and stretchy.
Roll the dough out and stretch with your hands until it's the right size.
Sprinkle cornmeal on a cookie sheet that is heat-safe to 450 degrees - odds are, this is NOT a non-stick sheet! Non-stick sheets aren't safe at high heat. Use a double thickness of tinfoil if you don't have a non-non-stick cookie sheet.
Place the rolled-out dough onto the cookie sheet and let sit in a nice warm place for half an hour, or until it is fluffy enough.
Preheat the oven to 450. Move the oven shelf to the lowest level, if you have an adjustable oven shelf. Bake the dough naked for 3 minutes, THEN add the toppings and bake for another 6 minutes, or until done.
Ingredients:
1 cup warm water (about 110 degrees)
2 1/2 tsp yeast (1 packet yeast)
1 tbsp sugar
1 cup oat flour
1/3 cup wheat germ
1 tsp salt
1 tbsp olive oil
2 tsp vital wheat gluten
Bread flour
Stir the sugar and yeast into the water and set aside for 5 minutes while it foams.
Combine the oat flour, wheat germ, salt, gluten, and 1 cup bread flour in a bowl. Add the olive oil and stir in the water mixture.
Beat with a spoon for 2 minutes, vigorously. You can use a machine for this if you have one.
Turn out onto an amply floured surface and knead for 5 minutes. Add plenty of bread flour as needed to keep it from sticking. You'll end up adding maybe another cup of flour. The final dough will be soft and stretchy.
Roll the dough out and stretch with your hands until it's the right size.
Sprinkle cornmeal on a cookie sheet that is heat-safe to 450 degrees - odds are, this is NOT a non-stick sheet! Non-stick sheets aren't safe at high heat. Use a double thickness of tinfoil if you don't have a non-non-stick cookie sheet.
Place the rolled-out dough onto the cookie sheet and let sit in a nice warm place for half an hour, or until it is fluffy enough.
Preheat the oven to 450. Move the oven shelf to the lowest level, if you have an adjustable oven shelf. Bake the dough naked for 3 minutes, THEN add the toppings and bake for another 6 minutes, or until done.
Wednesday, August 22, 2012
Black Bean Burgers with Eggs
An enhanced version of the recipe found in September 2012 edition of Cooking Light.
Ingredients:
To make the patties:
1 can black beans, rinsed and drained
1 egg
1/4 cup flour
1 tbsp peanut oil or canola oil
1/4 tsp salt
3/4 tsp cumin
1/2 cup chopped scallions
1 clove garlic, chopped
1/4 cup panko
Finishing the patties:
4 eggs
1/4 cup panko
Peanut or canola oil
Cheddar cheese with chipotle (optional but delicious)
Combine the ingredients for the patties in a food processor and process until combined but still pretty chunky.
Pour enough oil into a nonstick pan to cover the bottom. Preheat over medium heat.
Divide the mixture into quarters. Place remaining panko on a plate. Scoop up a quarter of the bean mixture, plop it into the panko, and press it gently flat. Then scoop up the patty and carefully lay it on the hot pan. Repeat with remaining bean mixture to form 4 patties.
You will note that panko is applied to only one side. If the patty sticks to the spoon when you press it flat in the panko, DO NOT PANIC. This is actually quite convenient. Let it stay stuck to the spoon and use that as an easy way to transfer the patty to the frying pan. Use a soft spatula to scrape it off the spoon and directly onto the hot pan.
Fry for 4 minutes, turn, and fry for 3 more minutes, or until golden and crisp. Remove to drain on paper towels.
Pour excess oil and any burnt bits of panko out of the pan, and return to stove. Crack four eggs into the pan and cook until firm.
Top each patty with an egg. If you're using the cheese, put as much cheese as you like atop the egg - the hot egg melts it. Serve immediately.
Ingredients:
To make the patties:
1 can black beans, rinsed and drained
1 egg
1/4 cup flour
1 tbsp peanut oil or canola oil
1/4 tsp salt
3/4 tsp cumin
1/2 cup chopped scallions
1 clove garlic, chopped
1/4 cup panko
Finishing the patties:
4 eggs
1/4 cup panko
Peanut or canola oil
Cheddar cheese with chipotle (optional but delicious)
Combine the ingredients for the patties in a food processor and process until combined but still pretty chunky.
Pour enough oil into a nonstick pan to cover the bottom. Preheat over medium heat.
Divide the mixture into quarters. Place remaining panko on a plate. Scoop up a quarter of the bean mixture, plop it into the panko, and press it gently flat. Then scoop up the patty and carefully lay it on the hot pan. Repeat with remaining bean mixture to form 4 patties.
You will note that panko is applied to only one side. If the patty sticks to the spoon when you press it flat in the panko, DO NOT PANIC. This is actually quite convenient. Let it stay stuck to the spoon and use that as an easy way to transfer the patty to the frying pan. Use a soft spatula to scrape it off the spoon and directly onto the hot pan.
Fry for 4 minutes, turn, and fry for 3 more minutes, or until golden and crisp. Remove to drain on paper towels.
Pour excess oil and any burnt bits of panko out of the pan, and return to stove. Crack four eggs into the pan and cook until firm.
Top each patty with an egg. If you're using the cheese, put as much cheese as you like atop the egg - the hot egg melts it. Serve immediately.
Saturday, April 21, 2012
Avocado Bubble "Tea"
Bubble tea is a catch-all term for any drink that contains "bubbles", which are actually large, dark colored tapioca pearls. The Taiwanese word for these is Boba, and our use of Bubble is probably a corruption of this word. A shop selling bubble tea usually offers actual tea with bobas, but also usually offers smoothies with bobas, milk tea with bobas, and juice with bobas. The dark pearls are colored in a variety of ways, but the best ones are colored with purple potato and have a slightly sweet, molasses-y taste.

Making bubble tea at home has been a dream for a long time, since Ariel and I found a fantastic bubble tea shop in Seattle that uses real fruits for the smoothies instead of the more common flavored powders. It's called WOW, which stands for Wonder Of Worship, and is an Asian Christian hangout and board game den in addition to its bubble tea vending.
There's nothing like that within comfortable driving distance of us here in Stoneham. So, in case you're in the same boat, here's a bubble tea recipe. You can also just leave the bubbles out and have a smoothie.
Ingredients (per smoothie):
1 small ripe avocado
Milk, or milk alternative if dairy intolerant - I suggest coconut-almond milk
Sweetener to taste
3 drops vanilla extract, or more to taste
Ice cubes (optional)
Slice the avocado in half down to the pit. Twist the two halves apart and pop the pit out with a spoon; discard the pit. Hold each half in your hand and, using a blunt knife, slice the inner meat vertically and horizontally. Then scoop the meat out with a spoon. It will come out already nicely chopped.
Put the avocado meat into a small mixing bowl if you have an immersion blender, also known as a stick blender. If you don't have one, put it into the regular blender, and afterwards, go get an immersion blender ;) Add enough milk to just cover the avocado. You may need to add more later. Avocados are remarkably powerful thickeners.
Add a little sweetener. You can use any kind of sweetener, either natural or artificial. If you want to use natural, then I suggest half honey and half organic sugar. About a teaspoon of each to start with, you can always add more. Also add the vanilla.
Puree the mixture until smooth. You will be amazed at how velvety smooth the avocado makes it. Taste and add more sweetener if needed.
Next, either put in the fridge to chill, or add a few ice cubes and stir until it's at your desired temperature.
To make the bobas:
You will need to buy the right ones. Go online to Amazon and order the kind specially made for bubble tea. If you try to use regular tapioca, you will be disappointed! (Obviously, you will need to do this well in advance of making the smoothie!) Then, follow the directions to cook them. When they're done cooking, drain in a strainer, and put into a bowl of ice water to chill before adding them to your smoothie.
To drink a bubble tea, you will either need a jumbo bubble tea straw that is big enough to suck up the bobas, or you will need to use a spoon. Enjoy!
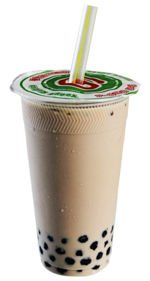
Making bubble tea at home has been a dream for a long time, since Ariel and I found a fantastic bubble tea shop in Seattle that uses real fruits for the smoothies instead of the more common flavored powders. It's called WOW, which stands for Wonder Of Worship, and is an Asian Christian hangout and board game den in addition to its bubble tea vending.
There's nothing like that within comfortable driving distance of us here in Stoneham. So, in case you're in the same boat, here's a bubble tea recipe. You can also just leave the bubbles out and have a smoothie.
Ingredients (per smoothie):
1 small ripe avocado
Milk, or milk alternative if dairy intolerant - I suggest coconut-almond milk
Sweetener to taste
3 drops vanilla extract, or more to taste
Ice cubes (optional)
Slice the avocado in half down to the pit. Twist the two halves apart and pop the pit out with a spoon; discard the pit. Hold each half in your hand and, using a blunt knife, slice the inner meat vertically and horizontally. Then scoop the meat out with a spoon. It will come out already nicely chopped.
Put the avocado meat into a small mixing bowl if you have an immersion blender, also known as a stick blender. If you don't have one, put it into the regular blender, and afterwards, go get an immersion blender ;) Add enough milk to just cover the avocado. You may need to add more later. Avocados are remarkably powerful thickeners.
Add a little sweetener. You can use any kind of sweetener, either natural or artificial. If you want to use natural, then I suggest half honey and half organic sugar. About a teaspoon of each to start with, you can always add more. Also add the vanilla.
Puree the mixture until smooth. You will be amazed at how velvety smooth the avocado makes it. Taste and add more sweetener if needed.
Next, either put in the fridge to chill, or add a few ice cubes and stir until it's at your desired temperature.
To make the bobas:
You will need to buy the right ones. Go online to Amazon and order the kind specially made for bubble tea. If you try to use regular tapioca, you will be disappointed! (Obviously, you will need to do this well in advance of making the smoothie!) Then, follow the directions to cook them. When they're done cooking, drain in a strainer, and put into a bowl of ice water to chill before adding them to your smoothie.
To drink a bubble tea, you will either need a jumbo bubble tea straw that is big enough to suck up the bobas, or you will need to use a spoon. Enjoy!
Saturday, February 25, 2012
Brown Rice Pudding with Brandy
Out of the blue, I acquired a craving for rice pudding. I insisted on brown rice for health purposes.
I've read that it's better to pre-cook the brown rice in water and then add it to the milk; I haven't tried this yet, so here's the traditional recipe.
Ingredients:
2/3 cup brown rice, uncooked
Optional: 1/4 cup golden raisins
3 cups milk
1/4 tsp cinnamon
1/4 tsp fresh ground nutmeg
3 tbsp butter or margarine
1 tbsp brandy
1 tsp vanilla
1/2 cup splenda or equivalent sweetness
Combine the rice, milk, cinnamon, and nutmeg in a small pot. Bring to a low boil, then turn down the heat and simmer gently. Cook, stirring frequently, for 45-60 minutes or until the pudding thickens to your preferred texture.
Add the brandy. Whisk in the butter, a tablespoon at a time. Then continue to cook, stirring constantly since it will burn easily at this point, until the alcohol from the brandy has evaporated. You can tell because the steam will stop smelling like booze.
Stir in the splenda and vanilla.
If you don't serve it immediately, this will thicken as it cools. It will also acquire a skin. To prevent this, place a sheet of plastic wrap directly onto the surface of the pudding.
Note on butter: The reason for the butter and the brandy is to cover up the bitter bite of the brown rice. I personally don't like the taste of brown rice on its own. The fat from the butter tempers bitterness, and whatever shines through anyway is swallowed up by the brandy. Spiced rum would also be tasty. I made this with 2% milk, so it's possible that using whole milk would not need butter.
Note on milk: You cannot substitute rice, almond, or soy milk effectively in this recipe. Soy milk will produce a runny pudding, though still edible; rice milk will not set at all but stay liquid like congee. I think, however, that the newly available coconut milk (not the kind in a can, the kind you buy in the milk department) might work well.
Next, I think I'll try this with wheat berries, or maybe farro!
I've read that it's better to pre-cook the brown rice in water and then add it to the milk; I haven't tried this yet, so here's the traditional recipe.
Ingredients:
2/3 cup brown rice, uncooked
Optional: 1/4 cup golden raisins
3 cups milk
1/4 tsp cinnamon
1/4 tsp fresh ground nutmeg
3 tbsp butter or margarine
1 tbsp brandy
1 tsp vanilla
1/2 cup splenda or equivalent sweetness
Combine the rice, milk, cinnamon, and nutmeg in a small pot. Bring to a low boil, then turn down the heat and simmer gently. Cook, stirring frequently, for 45-60 minutes or until the pudding thickens to your preferred texture.
Add the brandy. Whisk in the butter, a tablespoon at a time. Then continue to cook, stirring constantly since it will burn easily at this point, until the alcohol from the brandy has evaporated. You can tell because the steam will stop smelling like booze.
Stir in the splenda and vanilla.
If you don't serve it immediately, this will thicken as it cools. It will also acquire a skin. To prevent this, place a sheet of plastic wrap directly onto the surface of the pudding.
Note on butter: The reason for the butter and the brandy is to cover up the bitter bite of the brown rice. I personally don't like the taste of brown rice on its own. The fat from the butter tempers bitterness, and whatever shines through anyway is swallowed up by the brandy. Spiced rum would also be tasty. I made this with 2% milk, so it's possible that using whole milk would not need butter.
Note on milk: You cannot substitute rice, almond, or soy milk effectively in this recipe. Soy milk will produce a runny pudding, though still edible; rice milk will not set at all but stay liquid like congee. I think, however, that the newly available coconut milk (not the kind in a can, the kind you buy in the milk department) might work well.
Next, I think I'll try this with wheat berries, or maybe farro!
Sunday, December 18, 2011
Honey Roasted Root Vegetables

Copied almost verbatim from the Cooking Light recipes by the same name, this is quickly becoming "my" Thanksgiving dish. It is good all year though as long as the weather is cool enough for the oven.
Ingredients:
coarsely chopped peeled sweet potato (about 1 large) or winter squash or pumpkin
coarsely chopped peeled turnip (about 2 medium)
coarsely chopped parsnip (about 4 medium)
coarsely chopped carrot (about 6 medium)
1/4 cup honey (I like Orange Blossom but any full flavored honey will do)
2 tablespoons olive oil
1/2 teaspoon salt
6 shallots, quartered
Preheat oven to 450°.
Combine all ingredients except the cooking spray in a large bowl; toss to coat. Place vegetable mixture on a jelly-roll pan coated with cooking spray. Bake at 450° for 35 minutes or until vegetables are tender and begin to brown, stirring every 10 minutes.
Monday, December 5, 2011
Edible Edemame
I'm always looking for ways to make edimame, which is the technical term for fresh soybeans, into something worth eating. They are super good for you, after all. Here's a simple side dish with Asian flair. Took 7 minutes to make!
Ingredients:
2 shallots, minced
1 tsp roasted sesame oil
2 cups frozen shelled edemame
1 tbsp tamari or soy sauce
1/2 tsp garlic powder
Saute the shallots in the oil for 1 minute at medium heat, then add the edamame and turn the heat up to medium-high. Add the tamari. Cook and stir for 4 minutes. Add the garlic, and cook and stir for 30 seconds more. Then serve. Yay!
Ingredients:
2 shallots, minced
1 tsp roasted sesame oil
2 cups frozen shelled edemame
1 tbsp tamari or soy sauce
1/2 tsp garlic powder
Saute the shallots in the oil for 1 minute at medium heat, then add the edamame and turn the heat up to medium-high. Add the tamari. Cook and stir for 4 minutes. Add the garlic, and cook and stir for 30 seconds more. Then serve. Yay!
Friday, November 11, 2011
Mushroom Pastitsio
I have no idea what a pastitsio actually is, beyond delicious, but lately Cooking Light has had a couple of recipes for it that have been amazing. Here is my take on it... It's a cheesy wonderful casserole, with excellent leftovers.
Ingredients:
4 cups cooked rotini, whole wheat works well
16 ounces baby bellas, cremini mushrooms, or regular mushrooms, or a mix
1 yellow onion
4 cloves garlic or equivalent garlic powder
1 tsp Penzey's Bavarian Blend or 2 tbsp chopped fresh parsley
1/3 tsp kosher salt
1 cup tomato sauce
2 cups milk
2 tbsp flour
1 brick lowfat or fat free cream cheese
1/2 cup grated parmesan
1/2 cup grated mozzarella (reduced fat is okay but not fat free)
Mince the onion and chop the mushrooms finely. Saute together in a skillet over medium-high heat, stirring constantly, until the mushrooms give up their liquid and it mostly evaporates. Add the garlic, salt, and herbs. Transfer to a bowl and stir in the tomato sauce.
Add the milk into the skillet and whisk the flour in while it's still cool (you can't whisk flour into a hot liquid). Cook and stir until bubbly and thick. Turn the heat down to medium-low and add the cream cheese and parmesan, stirring until they melt and become smooth. Pour the cheese sauce over the pasta and stir.
Pour half of the pasta mixture into a medium sized casserole dish. Spread the mushroom mixture on top, then add the rest of the pasta mixture on top of that. Finally, sprinkle the mozzarella on top of the whole thing.
Bake at 400 until the cheese melts, then serve.
Ingredients:
4 cups cooked rotini, whole wheat works well
16 ounces baby bellas, cremini mushrooms, or regular mushrooms, or a mix
1 yellow onion
4 cloves garlic or equivalent garlic powder
1 tsp Penzey's Bavarian Blend or 2 tbsp chopped fresh parsley
1/3 tsp kosher salt
1 cup tomato sauce
2 cups milk
2 tbsp flour
1 brick lowfat or fat free cream cheese
1/2 cup grated parmesan
1/2 cup grated mozzarella (reduced fat is okay but not fat free)
Mince the onion and chop the mushrooms finely. Saute together in a skillet over medium-high heat, stirring constantly, until the mushrooms give up their liquid and it mostly evaporates. Add the garlic, salt, and herbs. Transfer to a bowl and stir in the tomato sauce.
Add the milk into the skillet and whisk the flour in while it's still cool (you can't whisk flour into a hot liquid). Cook and stir until bubbly and thick. Turn the heat down to medium-low and add the cream cheese and parmesan, stirring until they melt and become smooth. Pour the cheese sauce over the pasta and stir.
Pour half of the pasta mixture into a medium sized casserole dish. Spread the mushroom mixture on top, then add the rest of the pasta mixture on top of that. Finally, sprinkle the mozzarella on top of the whole thing.
Bake at 400 until the cheese melts, then serve.
Monday, July 18, 2011
Rumbledethumps (Potato Pie)

Every nation in Europe, in fact every tiny geographical region, has its own "leftovers" dish, usually involving potatoes to glue the leftovers together. This one is particularly hearty and makes both a satisfying dinner and a fantastic leftover lunch. You can hold the slices in your hand to eat them, and they don't go bad for quite a while at room temperature, so they are good for bringing places. This is a variant of a Scottish peasant recipe called Rumbledethumps (wikipedia link). What differentiates it from, for example, colcannon or bubble-and-squeak is the addition of a cheese topping followed by baking in a plate.
Ingredients:
4 Yukon gold potatoes, with skins
1 bunch scallions, chopped
1 big box or bag of baby arugula, or baby spinach if you prefer
3 cloves garlic, minced
2 tbsp smart balance or butter
1 cup shredded cheddar
1/2 cup shredded gouda (or additional 1/2 cup cheddar)
1/3 cup shredded parmesan
3 eggs
Salt and pepper to taste (I use none, but the traditional recipe calls for lots, so it's up to you)
Chop and steam the potatoes, or bake them in tinfoil, until soft. Mash.
Saute the scallions and garlic in the butter until they begin to soften, then add the arugula and saute until wilted. Transer to a cutting board and chop (it's easier to chop them after cooking than before).
Heat oven to 350.
Sprinkle half the cheddar into the bottom of a well-greased pie plate. Combine remaining cheddar and all other ingredients (except parmesan) in a bowl and mix. Pour into pie plate and top with parmesan.
Bake for 20-30 minutes or until set but not puffy.
You can eat this fresh but honestly I like the leftovers better!
NOTE: You can replace the cheese with fake cheese quite easily for the lactose-intolerant.
Thursday, February 17, 2011
Hearty Mexican Chard & Chickpea Soup
A recipe modified in enough ways that I consider it mine at this point, it's fast (15 minutes if you're good!) and easy, not to mention satisfying. A good way to get some greens and fiber, too.
Ingredients:
1 head Swiss chard, doesn't matter what kind - the stems lose their color when boiled, so if white is cheaper, then just buy white
1 small can chickpeas
1 large onion
3 cloves garlic
2 cups broth, chicken or vegetable
1 tsp cumin
1/4-1/2 tsp ground chipotle pepper, or 1-2 canned chipotle peppers, seeded and minced
1 brick pepper jack cheese (low-fat works well here)
1/2 brick regular monterey jack cheese (low-fat works well here)
(Note that the cheeses must be bricks, not shredded.)
Tear the chard leaves into bite-sized pieces and set aside. Slice the ribs like celery and set aside, separate from the leaves.
Chop the onion and the garlic and sauté in olive oil over medium heat until the garlic is translucent. Add the spices and the broth and bring to a boil.
Once boiling, add the chard ribs and boil for 4 minutes. Then add the leaves and boil for another 2 or 3 minutes, or until all the vegetables are tender.
Remove from heat and add the chickpeas I do it this way so that the chickpeas cool the soup slightly, so it's ready to eat without needing an ice cube to cool it. If you don't intend to serve it immediately, or if you enjoy burning your tongue on your soup (weirdo) then add the chickpeas along with the leaves and boil an extra minute to warm them.
Cut the cheese into cubes about half an inch wide. Put 1/4 of the cheese cubes in the bottoms of 4 soup bowls and ladle the soup on top.
Frankly, you had me at "cheese cubes."
A note on chipotle peppers: Chipotle has recently come into vogue. Even McDonald's has chipotle-flavored stuff now. The chipotle pepper is a smoked red jalapeno. If you are familiar with jalapenos, then you can safely use them equivalently in terms of heat.
Until recently, I could only find these peppers in cans of adobo sauce, which was annoying because I never used the whole can before it went bad, and also I had to wear gloves to handle them or inevitably the pepper's heat would find its way into some tiny cut I didn't know I had and I'd be running around the kitchen yelling about how I should have worn gloves. Now, though, McCormick's Spices sells ground dried chipotle peppers and suddenly chipotle is SUPER easy to use. (Although I personally buy mine from Penzey's, I'm sure McCormick's is fine.) Try a sprinkle atop eggs, in anything mexican or beef-based, and on top of chef's salads!
Ingredients:
1 head Swiss chard, doesn't matter what kind - the stems lose their color when boiled, so if white is cheaper, then just buy white
1 small can chickpeas
1 large onion
3 cloves garlic
2 cups broth, chicken or vegetable
1 tsp cumin
1/4-1/2 tsp ground chipotle pepper, or 1-2 canned chipotle peppers, seeded and minced
1 brick pepper jack cheese (low-fat works well here)
1/2 brick regular monterey jack cheese (low-fat works well here)
(Note that the cheeses must be bricks, not shredded.)
Tear the chard leaves into bite-sized pieces and set aside. Slice the ribs like celery and set aside, separate from the leaves.
Chop the onion and the garlic and sauté in olive oil over medium heat until the garlic is translucent. Add the spices and the broth and bring to a boil.
Once boiling, add the chard ribs and boil for 4 minutes. Then add the leaves and boil for another 2 or 3 minutes, or until all the vegetables are tender.
Remove from heat and add the chickpeas I do it this way so that the chickpeas cool the soup slightly, so it's ready to eat without needing an ice cube to cool it. If you don't intend to serve it immediately, or if you enjoy burning your tongue on your soup (weirdo) then add the chickpeas along with the leaves and boil an extra minute to warm them.
Cut the cheese into cubes about half an inch wide. Put 1/4 of the cheese cubes in the bottoms of 4 soup bowls and ladle the soup on top.
Frankly, you had me at "cheese cubes."
A note on chipotle peppers: Chipotle has recently come into vogue. Even McDonald's has chipotle-flavored stuff now. The chipotle pepper is a smoked red jalapeno. If you are familiar with jalapenos, then you can safely use them equivalently in terms of heat.
Until recently, I could only find these peppers in cans of adobo sauce, which was annoying because I never used the whole can before it went bad, and also I had to wear gloves to handle them or inevitably the pepper's heat would find its way into some tiny cut I didn't know I had and I'd be running around the kitchen yelling about how I should have worn gloves. Now, though, McCormick's Spices sells ground dried chipotle peppers and suddenly chipotle is SUPER easy to use. (Although I personally buy mine from Penzey's, I'm sure McCormick's is fine.) Try a sprinkle atop eggs, in anything mexican or beef-based, and on top of chef's salads!
Sunday, November 28, 2010
Secret Chili (Meatless!)
I love a good chili. This one was the product of a particularly creative cooking session. There are many secret ingredients but the secret-est of them all is the Dr Pepper! You could also use any kind of cola; lime soda might be cool, too. Basically I used soda instead of the usual sugar. The flavor is undetectable as anything but a subtle enhancements, same as the chocolate and the cinnamon.
If you use diet soda, you must stir it in at the very end, after you've removed the pot from the heat, lest the aspartame be destroyed by the heat.
Ingredients:
1 large onion, chopped
2 poblano chiles, which are like large, dark, slightly wrinkled jalapeños - 1 green bell pepper plus 1 jalapeño is an acceptable substitute, diced
2 jalapenos, minced
1/2 can of crushed tomatoes
1 1/2 tsp granulated garlic, or 5 minced garlic cloves
1/4 tsp cinnamon
1/3 tsp ground coriander
1/2 tsp oregano flakes
1 tsp cumin
1 tsp tamari or soy sauce
1/4 tsp smoked paprika (or you don't have this, use 1 tsp regular paprika)
1 tsp beef or vegetable bouillon (broth is NOT a substitute, must use bouillon)
1/2 ounces baking chocolate or 1/2 tbsp cocoa powder
2 cans of beans, I like to use two different colors for a pretty effect
1/3 cup dr pepper
Saute the onion and peppers over medium heat in a tablespoon or corn oil until tender. Add the tomatoes and next 6 ingredients (through chocolate). Stir well, and simmer 10 minutes. Add the beans and stir until heated. Remove from heat and add the soda.
If you want to make the chili hotter for some and milder for others, reserve half the jalapenos and serve as a garnish for the heat-lovers. This chili is best served with cheese on top (because, frankly, EVERYTHING is best served with cheese on top). I like pre-shredded Mexican blend but cheddar is fine. Sour cream and green onions would also be good toppers.
If you use diet soda, you must stir it in at the very end, after you've removed the pot from the heat, lest the aspartame be destroyed by the heat.
Ingredients:
1 large onion, chopped
2 poblano chiles, which are like large, dark, slightly wrinkled jalapeños - 1 green bell pepper plus 1 jalapeño is an acceptable substitute, diced
2 jalapenos, minced
1/2 can of crushed tomatoes
1 1/2 tsp granulated garlic, or 5 minced garlic cloves
1/4 tsp cinnamon
1/3 tsp ground coriander
1/2 tsp oregano flakes
1 tsp cumin
1 tsp tamari or soy sauce
1/4 tsp smoked paprika (or you don't have this, use 1 tsp regular paprika)
1 tsp beef or vegetable bouillon (broth is NOT a substitute, must use bouillon)
1/2 ounces baking chocolate or 1/2 tbsp cocoa powder
2 cans of beans, I like to use two different colors for a pretty effect
1/3 cup dr pepper
Saute the onion and peppers over medium heat in a tablespoon or corn oil until tender. Add the tomatoes and next 6 ingredients (through chocolate). Stir well, and simmer 10 minutes. Add the beans and stir until heated. Remove from heat and add the soda.
If you want to make the chili hotter for some and milder for others, reserve half the jalapenos and serve as a garnish for the heat-lovers. This chili is best served with cheese on top (because, frankly, EVERYTHING is best served with cheese on top). I like pre-shredded Mexican blend but cheddar is fine. Sour cream and green onions would also be good toppers.
Sunday, October 10, 2010
Pumpkin Flan
There's a delicious recipe for butternut flan in Cookling Light, but it has serious flaws. Butternut squash, though delicious, is annoying to process, and the recipe produces a watery, bland result when followed exactly (reviewers agree).
I have a different version made with canned pumpkin. You might use fresh pumpkin, but I don't, not for pies: Fresh pumpkin is an unpredictable product, sometimes stringy and watery, sometimes picked unripe and allowed to turn orange off the vine, resulting in a flavorless result. But the biggest issue is the irregular moisture content.
Canned pumpkin has a good and predictable flavor, a low moisture content, and is very easy to use. The disadvantage is the slight "canned" flavor, which is not noticable in a highly spiced recipe, but unpleasant (to me) in a recipe where the flavor of the pumpkin is the dominant flavor, like pumpkin soup.
Thus, I use canned for pies and breads/muffins/cookies/etc., and fresh for soups and anytime I intend to use it as cubes instead of puree.
But all this is beside the point. The pumpkin flan is essentially a pumpkin pie, but instead of a crust, it has caramel flan sauce on the bottom! The filling can be made with Splenda (custards are one of the best times to use artificial sweeteners), and with no crust, there's no white flour or butter, so the end result consists mostly of wholesome milk, eggs, and pumpkin.
Filling:
1 can unsweetened plain pumpkin puree (NOT pumpkin pie filling)
1 5-ounce can evaporated milk
1/2 cup milk
2/3 cup Splenda or equivalent
1 tsp vanilla
1 tsp cinnamon
1/2 tsp ground ginger
1/4 tsp nutmeg
1/4 tsp cloves or allspice
3 eggs
1 egg yolk
Sauce:
1/3 cup sugar (raw sugar is okay)
1 tsp corn syrup (you can leave it out if you don't have any)
3 tbsp water
Coat 6 custard cups (ramekins) with butter or cooking spray. Preheat the oven to 325. Place 6 cups of water on the back burner and let it heat up while you're working.
Make the caramel sauce by putting the ingredients into a small pan, ideally stainless steel or heavy anodized aluminum, and stirring over medium heat until it melts together. Then leave it to boil, NOT stirring, until it turns golden. Then, immediately pour the hot sugar into the ramekins, working quickly because it will harden and become unusable if it cools. Fill the pot with water once you're done, and leave it to soak so it will be easy to clean later.
Combine the filling ingredients in a bowl and stir well. Don't mix air into it - that means be careful if you use a whisk, and don't use an electric mixer or blender. If you have an immersion blender, however, this is a great time to use it, provided you insert the blender carefully and keep it under the surface to avoid whipping air in. The reason to avoid stirring in air is because if you do, the filling will puff up and have an odd texture.
Place the ramekins onto a jelly-roll pan (baking sheet with a lip around the edges, as opposed to the kind that is totally flat) and pour the filling into them. Then place the pan into the oven. THEN, carefully pour the hot water you've been boiling into the pan, so that the ramekins are sitting in the hot water. Depending on the size of your pan, you might have to add more water; you want it to be almost full, such that the ramekins are sitting in water about halfway up their sides.
Bake for 25 minutes, then open the oven. Remove the ramekins carefully, putting them on a cooling rack, and leave the hot water in the oven until it's cooled off and is safe to remove. Don't try to take the whole pan out at once! It will spill and you might burn yourself!
Weird things I did and why:
1. Why some whole eggs and some yolks? An authentic flan is made with all yolks, but that's pretty rich and unhealthy, and then I never know what to do with the whites. But you can make it with 6 yolks instead if you like.
2. Can I make this non-dairy? Yes. Replace the evaporated milk with plain non-dairy liquid creamer, and replace the regular milk with your favorite milk substitute.

3. Why the immersion blender? I love my immersion blender. It is easy to use and easy to clean. It's good for custards because it will blend up the albumen (egg white stringy bits) so the custard has an even texture, without whipping air into it. Just slip the blender in carefully to avoid trapping air, and turn it on, keeping the head underwater. I also use this for mixing cheesecake batter for the same reason. Air bubbles are the enemy of cheesecake.
You can serve the flan by upending it over a plate, but I find that difficult, so I just eat it out of the ramekin. Yum!
I have a different version made with canned pumpkin. You might use fresh pumpkin, but I don't, not for pies: Fresh pumpkin is an unpredictable product, sometimes stringy and watery, sometimes picked unripe and allowed to turn orange off the vine, resulting in a flavorless result. But the biggest issue is the irregular moisture content.
Canned pumpkin has a good and predictable flavor, a low moisture content, and is very easy to use. The disadvantage is the slight "canned" flavor, which is not noticable in a highly spiced recipe, but unpleasant (to me) in a recipe where the flavor of the pumpkin is the dominant flavor, like pumpkin soup.
Thus, I use canned for pies and breads/muffins/cookies/etc., and fresh for soups and anytime I intend to use it as cubes instead of puree.
But all this is beside the point. The pumpkin flan is essentially a pumpkin pie, but instead of a crust, it has caramel flan sauce on the bottom! The filling can be made with Splenda (custards are one of the best times to use artificial sweeteners), and with no crust, there's no white flour or butter, so the end result consists mostly of wholesome milk, eggs, and pumpkin.
Filling:
1 can unsweetened plain pumpkin puree (NOT pumpkin pie filling)
1 5-ounce can evaporated milk
1/2 cup milk
2/3 cup Splenda or equivalent
1 tsp vanilla
1 tsp cinnamon
1/2 tsp ground ginger
1/4 tsp nutmeg
1/4 tsp cloves or allspice
3 eggs
1 egg yolk
Sauce:
1/3 cup sugar (raw sugar is okay)
1 tsp corn syrup (you can leave it out if you don't have any)
3 tbsp water
Coat 6 custard cups (ramekins) with butter or cooking spray. Preheat the oven to 325. Place 6 cups of water on the back burner and let it heat up while you're working.
Make the caramel sauce by putting the ingredients into a small pan, ideally stainless steel or heavy anodized aluminum, and stirring over medium heat until it melts together. Then leave it to boil, NOT stirring, until it turns golden. Then, immediately pour the hot sugar into the ramekins, working quickly because it will harden and become unusable if it cools. Fill the pot with water once you're done, and leave it to soak so it will be easy to clean later.
Combine the filling ingredients in a bowl and stir well. Don't mix air into it - that means be careful if you use a whisk, and don't use an electric mixer or blender. If you have an immersion blender, however, this is a great time to use it, provided you insert the blender carefully and keep it under the surface to avoid whipping air in. The reason to avoid stirring in air is because if you do, the filling will puff up and have an odd texture.
Place the ramekins onto a jelly-roll pan (baking sheet with a lip around the edges, as opposed to the kind that is totally flat) and pour the filling into them. Then place the pan into the oven. THEN, carefully pour the hot water you've been boiling into the pan, so that the ramekins are sitting in the hot water. Depending on the size of your pan, you might have to add more water; you want it to be almost full, such that the ramekins are sitting in water about halfway up their sides.
Bake for 25 minutes, then open the oven. Remove the ramekins carefully, putting them on a cooling rack, and leave the hot water in the oven until it's cooled off and is safe to remove. Don't try to take the whole pan out at once! It will spill and you might burn yourself!
Weird things I did and why:
1. Why some whole eggs and some yolks? An authentic flan is made with all yolks, but that's pretty rich and unhealthy, and then I never know what to do with the whites. But you can make it with 6 yolks instead if you like.
2. Can I make this non-dairy? Yes. Replace the evaporated milk with plain non-dairy liquid creamer, and replace the regular milk with your favorite milk substitute.
3. Why the immersion blender? I love my immersion blender. It is easy to use and easy to clean. It's good for custards because it will blend up the albumen (egg white stringy bits) so the custard has an even texture, without whipping air into it. Just slip the blender in carefully to avoid trapping air, and turn it on, keeping the head underwater. I also use this for mixing cheesecake batter for the same reason. Air bubbles are the enemy of cheesecake.
You can serve the flan by upending it over a plate, but I find that difficult, so I just eat it out of the ramekin. Yum!
Saturday, October 2, 2010
Fun with Wheat Berries
I picked up a bag of wheat berries at the store the other day, for no reason other than that they looked cool. I like Grape Nuts Flakes, which are to wheat berries as instant oatmeal is to oat groats, so I thought they'd be tasty.
They were.
The particular brand I got was parboiled, so it only took 15 minutes to cook. I cooked it with a pinch of salt and then added maple syrup and melted Smart Balance, to excellent effect.
Delicious Basic Wheat Berries
1 Serving
1/4 cup wheat berries
2/3 cup water
Pinch salt
1 tbsp maple syrup
1 pat Smart Balance 50/50 Butter Blend (or regular smart balance, or butter)
Boil the berries and the water with the salt for 15 minutes, or until it's al dente - a firm exterior and tender interior. Drain and add the seasonings. Yay wheat berries!
They are also excellent leftovers, warmed in the microwave.
UPDATE October 6, 2010: New wheat berry idea :)
Harvest Wheat Berry Salad
1/2 cup wheat berries
2 cups water
Big pinch of salt
1/4 cup dried cranberries
1/2 cup chopped walnuts
1 tbsp maple syrup
2 tsp butter or Smart Balance
1 apple, peeled and chopped
Cook the wheat berries for 15 minutes, then drain. Add the butter and syrup and toss until the butter is melted. Then add the cranberries, walnuts and apple.
You can make this with pre-made wheat berries from the recipe above. You can also store this to eat later, but the apples will turn brown if you do, so either toss them with lemon juice first or add them right before serving. Makes a good afternoon snack.
They were.
The particular brand I got was parboiled, so it only took 15 minutes to cook. I cooked it with a pinch of salt and then added maple syrup and melted Smart Balance, to excellent effect.
Delicious Basic Wheat Berries
1 Serving
1/4 cup wheat berries
2/3 cup water
Pinch salt
1 tbsp maple syrup
1 pat Smart Balance 50/50 Butter Blend (or regular smart balance, or butter)
Boil the berries and the water with the salt for 15 minutes, or until it's al dente - a firm exterior and tender interior. Drain and add the seasonings. Yay wheat berries!
They are also excellent leftovers, warmed in the microwave.
UPDATE October 6, 2010: New wheat berry idea :)
Harvest Wheat Berry Salad
1/2 cup wheat berries
2 cups water
Big pinch of salt
1/4 cup dried cranberries
1/2 cup chopped walnuts
1 tbsp maple syrup
2 tsp butter or Smart Balance
1 apple, peeled and chopped
Cook the wheat berries for 15 minutes, then drain. Add the butter and syrup and toss until the butter is melted. Then add the cranberries, walnuts and apple.
You can make this with pre-made wheat berries from the recipe above. You can also store this to eat later, but the apples will turn brown if you do, so either toss them with lemon juice first or add them right before serving. Makes a good afternoon snack.
Tuesday, September 28, 2010
Delicious Almond Milk Drink
I tried making homemade almond milk recently, grinding the almonds in my blender. It tasted great, but the texture was gritty and straining it through the cheesecloth was a pain.
So I tried commercial almond milk, specifically Almond Breeze (Blue Diamond's almondmilk). The flavor wasn't as good as my own, having an oddly metallic taste that I suspect comes from the vitamins and minerals added to make it a better substitute for cow's milk. But I've been enjoying playing with it nonetheless, and have settled on a favorite Indian-inspired recipe for it.
Makes 1 serving
1/2 cup Almond Breeze
1/3 cup whole milk
2 packets Ideal, Truvia, or whatever sweetener you like, or 1 1/2 tbsp Splenda or sugar
Honey to taste, optional
1/4 tsp ground cardamom
Dash cinnamon
1/4 tsp almond extract
1/4 tsp vanilla extract
Just mix it all up in a cup and you're good to go. Indian food lore says the combination of almonds, milk and cardamom is an excellent restorative and cooling drink. I say it's really tasty.
So I tried commercial almond milk, specifically Almond Breeze (Blue Diamond's almondmilk). The flavor wasn't as good as my own, having an oddly metallic taste that I suspect comes from the vitamins and minerals added to make it a better substitute for cow's milk. But I've been enjoying playing with it nonetheless, and have settled on a favorite Indian-inspired recipe for it.
Makes 1 serving
1/2 cup Almond Breeze
1/3 cup whole milk
2 packets Ideal, Truvia, or whatever sweetener you like, or 1 1/2 tbsp Splenda or sugar
Honey to taste, optional
1/4 tsp ground cardamom
Dash cinnamon
1/4 tsp almond extract
1/4 tsp vanilla extract
Just mix it all up in a cup and you're good to go. Indian food lore says the combination of almonds, milk and cardamom is an excellent restorative and cooling drink. I say it's really tasty.
Subscribe to:
Posts (Atom)