Showing posts with label healthy substitutions. Show all posts

Saturday, November 15, 2014

Chewy Molasses Cookies with Einkorn and Teff

Your basic molasses cookie, but tweaked to include a blend of einkorn and teff flours for fewer allergens and far more nutrition. Healthy enough to be a post- or pre-workout snack! And DELICIOUS, too, with a perfect texture: tender and moist inside, delicately crispy outside. Not too sweet. See explanation below for more info about the ingredients.

Ingredients:

5 ounces einkorn flour
3 ounces teff flour
1/4 cup Stevia, the fluffy kind that is designed to measure 1:1 with sugar, or equivalent sweetener
1 1/4 tsp cinnamon
1/2 tsp cloves
1/3 tsp allspice
3/4 tsp ginger
1/4 tsp salt
3/4 tsp baking powder
6 tbsp softened butter
1 egg
1/3 cup molasses

 Combine dry ingredients in a bowl and stir.

 Put the butter and the egg in a food processor and process until slightly fluffed. Add the molasses and process until combined.

 Add the dry ingredients to the food processor in three batches (one third of the dry mixture at a time). Each time, process until just smooth. Note that, due to the low gluten content of these cookies, you don't have to fear overmixing them. They will not get tough.

Scoop out into a bowl and refrigerate for 30 minutes or so.

 Preheat oven to 350.

 Divide the dough into four pieces. Roll each piece into a snake about as long as your hand. Cut each snake into 6 pieces. This will give you 24 cookies of equal size with no need to bother measuring them--neat, huh?

 Roll each piece into a ball. Now, you have a choice. You can place them on the cookie sheet as-is, OR, you can roll them in sugar first. Believe me when I say they are delicious even without the sugar. I am chowing down on a plate full of them right now. However, many people feel that the texture of the sugar is a vital part of this kind of cookie, and far be it from me to deny you this pleasure if you want it!

Whether you've rolled them in sugar or not, either way, you will now bake them for 11 minutes or until set. DO NOT OVERBAKE or they won't be chewy anymore!

 Enjoy :)

Ingredient explanations:

Einkorn: Einkorn is a primitive wheat. It is grown mainly in Italy, where it was used for some traditional foods, and thank God for that or we might have lost it!

 Einkorn has been selectively bred to increase its yield and so on, but it has never been hybridized (cross-bred with other species). As a result, it has a less complicated genetic structure and a different gluten protein. Many people who cannot tolerate modern gluten have no trouble with einkorn. Now, if you have a wheat allergy, I do not recommend you go overboard on einkorn, even if you think you can tolerate it! Reason being, allergies are flexible things and you could easily develop an intolerance to this gluten, too. Instead, I suggest you preserve it for special occasions, like pies, birthday cake, and Christmas baking.

 Einkorn flour also happens to have a delightful silky texture, lovely soft-gold color, and a richer, almost tangier flavor than modern wheat. The only tricky thing about using it is, it doesn't absorb as much water as modern flour, so you will need to reduce the amount of liquids you use. With cookies, however, this is not an issue as there is no added liquid.

 I use Jovial brand of einkorn flour, but that's because I haven't found any others, not because I specifically prefer that brand.

Teff: Teff means "lost" and refers to its tiny size. It is the world's smallest grain. This is significant because it means the ratio of starch to "good stuff" is better.

Teff has more protein and more minerals than any other grain, and a lot of fiber, too. It's especially important for its magnesium content. Considering more than half of Americans get way less magnesium in their diet than they need, and considering what a deleterious effect low magnesium can have on mood and mental functioning, it's pretty awesome that one serving of teff contains 45% of your entire day's magnesium requirement!

Teff also happens to be incredibly flavorful, with a lightly sweet and fruity aspect that reminds me of cider and makes it perfect for this kind of cookie. I also love to add it to pancakes.

I use Bob's Red Mill brand of teff flour, and that is important because milling teff is not easy. I have tried other brands and they are gritty, as though sand or dirt got in with the tiny teff grains. So, not all teff flours are created equal. Bob's is worth the slightly higher price.

Wednesday, January 29, 2014

Grain Hipster Pizza Dough

I've arrived at an AWESOME PIZZA CRUST. It is flavorful, soft and tender, but with a nice texture. Start making it an hour before you want to eat it.

Ingredients:
1 cup warm water (about 110 degrees)
2 1/2 tsp yeast (1 packet yeast)
1 tbsp sugar
1 cup oat flour
1/3 cup wheat germ
1 tsp salt
1 tbsp olive oil
2 tsp vital wheat gluten
Bread flour

Stir the sugar and yeast into the water and set aside for 5 minutes while it foams.

Combine the oat flour, wheat germ, salt, gluten, and 1 cup bread flour in a bowl. Add the olive oil and stir in the water mixture.

Beat with a spoon for 2 minutes, vigorously. You can use a machine for this if you have one.

Turn out onto an amply floured surface and knead for 5 minutes. Add plenty of bread flour as needed to keep it from sticking. You'll end up adding maybe another cup of flour. The final dough will be soft and stretchy.

Roll the dough out and stretch with your hands until it's the right size.

Sprinkle cornmeal on a cookie sheet that is heat-safe to 450 degrees - odds are, this is NOT a non-stick sheet! Non-stick sheets aren't safe at high heat. Use a double thickness of tinfoil if you don't have a non-non-stick cookie sheet.

Place the rolled-out dough onto the cookie sheet and let sit in a nice warm place for half an hour, or until it is fluffy enough.

Preheat the oven to 450. Move the oven shelf to the lowest level, if you have an adjustable oven shelf. Bake the dough naked for 3 minutes, THEN add the toppings and bake for another 6 minutes, or until done.

Saturday, September 7, 2013

Awesome Pancakes - gluten-free, lower-carb, high-fiber, DELICIOUS

I have been seriously remiss in not posting my recent grain-hipster experiments on this blog.

In case you're wondering, NO, I did NOT name these "awesome pancakes" myself. This is, however, what Ariel calls them. Like so:
Me: "What do you want for breakfast?"
Ariel: "I want those awesome pancakes again."

This recipe makes one serving. Just multiply it out to make enough for more people.

Ingredients:

2 tbsp Almond flour
2 tbsp ground flaxseed (I like Bob's Red Mill golden flaxseed)
3 tbsp oat flour (be sure to buy Gluten Free oat flour if you need gluten free)
1 packet of Stevia or equivalent sweetener
1/2 tsp baking powder
1 egg (optional)
Milk or milk substitute
Pinch of salt
1/4 tsp vanilla

Whisk the dry ingredients together.

Add wet ingredients. Note that, if you do not use an egg, you will need more milk. Basically, just add liquid until it is a slightly runny pancake batter. It is important to make the batter a tad thinner than you usually do! The flaxseed will make it thicken up.

Let the batter sit on the countertop and thicken while the griddle heats. You don't need it to be quite as hot as usual for pancakes.

Grease the griddle and pour out into four little pancakes. Cook until the edges loosen from the pan and look a bit golden. You want the edges to be a little crispy. Yummmm....

These are delicious with the usual butter and syrup, but they are very flavorful on their own, so you can also top them with peanut butter (or other almond butter) for a more savory breakfast, or even eat them plain! They're moist and tender and make a good snack, too.

MATH:
Here, I will do some math for you to make larger volumes of batter.

FOR 2 PEOPLE:
1/4 cup almond flour
1/4 cup ground flaxseed
6 tbsp oat flour (that's 1/4 cup plus 2 tbsp)
1 tsp baking powder
1/4 tsp salt
2 packets Stevia or equivalent
1 or 2 eggs, or none if you're leaving them out (you might have guessed that the egg quotient is flexible)
Milk or whatever
1/2 tsp vanilla

FOR 4 PEOPLE:
1/2 cup almond flour
1/2 cup ground flaxseed
3/4 cup oat flour
2 tsp baking powder
1/3 tsp salt
4 packets Stevia or equivalent
2 or 3 eggs, or none if you're leaving them out (you might have guessed that the egg quotient is flexible)
Milk or whatever
1 tsp vanilla

Wednesday, August 15, 2012

Shortcut Chicken Pot Pie

A long time ago I posted a recipe for chicken pot pie "better than store bought." I still like that recipe, but since then I have gotten lazier about making it and now I have a much faster and incidentally somewhat cheaper version that is still delicious enough to serve to company.

Ingredients:
Filling:
1 bag frozen peas and carrots
1/2 bag frozen pearl onions (NOT in sauce, just plain onions), or more to taste
Breast meat of 1 rotisserie chicken
1 cup water
1 cup milk
1/4 cup white flour
1 1/2 tsp chicken bouillon or equivalent broth mix

Topping:
1 1/2 cups white whole wheat flour
1/2 cup pastry or cake flour
1 tbsp baking powder
1/2 tsp cream of tartar 
1/3 tsp salt
2 tsp sugar
1 stick butter or stick margarine
2/3 cup milk

First, make the topping. Preheat the oven to 450. Also put a large pot of water on to boil.

In a mixing bowl, combine the dry ingredients and stir. Chop the butter into small pieces and drop into the dry ingredients. Then, use a pastry cutter to cut in the butter until the pieces are no bigger than peas. Add the milk and stir gently until a dough forms. It will be stiff.

Turn the dough out onto a well-floured surface. Knead carefully 8 times. Kneading a biscuit is not the same as kneading bread dough; each time you knead the dough, you will press it out flat to about an inch thick, then fold it in half. This creates the nice tender layers in the biscuit.

Roll the biscuit dough out into a shape that will fit into whatever container you're going to use for the pie. Basically, the topping is going to be one giant biscuit. You can use a pie plate or a rectangular Corningware, whatever you like that is about the right size. It doesn't have to be oven-safe.

Lay a sheet of tinfoil on a baking sheet that is safe to use at high heat. Most nonstick baking sheets are NOT SAFE at high heat. If all you have is nonstick sheets, then just use a double thickness of tinfoil.

Grease the tinfoil and then laay the giant biscuit on top. Carefully fold up the edges of the tinfoil to make about a 1/2 inch lip all the way around. This will catch any butter that melts out of the huge biscuit, so it doesn't drip onto your oven and smoke.

Bake the biscuit for 12 minutes or until golden. You will want to bake it a tiny bit longer than you usually bake biscuits to be sure it's cooked all the way through.

While the biscuit is cooking, make the filling. The water should be boiling now so just dump in the frozen veggies. Set a timer for 5 minutes and start working on the gravy.

For the gravy, whisk the flour directly into the cold milk until smooth. Then pour the milk mixture into a saucepan and add the water and bouillon and (optional) any herbs you want to add, such as a pinch of thyme, parsley, or sage. Cook, stirring constantly, over medium-high heat until thickened and bubbly. Remove from heat.

By now the veggies are probably done. When they are done cooking, dump them into a colander to strain out the water, then pour them into the pie plate (or other serving container that you're going to serve the pie in).

If you haven't already chopped the chicken, do it now, and then add the chicken pieces to the veggies.

Pour the gravy over the veggies and chicken, and stir gently.

By this time the biscuit is probably done baking. Carefully, using two large spatulas or pancake turners, lift the giant biscuit off the tinfoil and place on top of the gravy mixture.

Ta-daaa! Your chicken pie is done, and it is PERFECT. Eat it!

Variations:

You can use the whole chicken including dark meat if you like dark meat. I don't, so I feed the legs to Ariel (hubby). Or, you can cook your own chicken, but rotisserie is really really good so I don't recommend this unless you don't have access to rotisserie or it's too expensive.

You can use frozen mixed vegetables instead of peas and carrots, but you must pick out the green beans. They make the filling soggy.

You can also make drop biscuits instead of the giant biscuit if you don't want to bother rolling it out and kneading it.

You can save calories and carbs by making a half recipe of the biscuit topping. It will be thinner and bake in much less time, so check on it after 7 minutes.

Can't find frozen pearl onions? You can use frozen chopped onions instead of pearl onions. The pearl onions are nicer, but the regular chopped onions are fine if that's all you can get. Don't use the kind that comes in a sauce or your gravy will be too salty.

Don't have pastry flour? Substitute an additional 1/4 cup whole wheat flour plus 1/4 cup cornstarch.

Don't have whole wheat flour? Use 2 cups regular flour and leave out the pastry flour.

Don't have cream of tartar? Use an additional 1/2 tsp baking powder, although you should try the cream of tartar sometime. You might find you really like biscuits made with it.

Can't drink milk? Replace it with water. It will still be good. DO NOT use a milk substitute, because they will all make the gravy come out wrong. Lactaid milk is fine.

Saturday, April 21, 2012

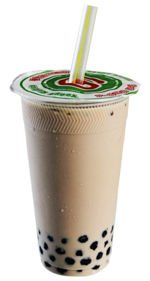
Avocado Bubble "Tea"

Bubble tea is a catch-all term for any drink that contains "bubbles", which are actually large, dark colored tapioca pearls. The Taiwanese word for these is Boba, and our use of Bubble is probably a corruption of this word. A shop selling bubble tea usually offers actual tea with bobas, but also usually offers smoothies with bobas, milk tea with bobas, and juice with bobas. The dark pearls are colored in a variety of ways, but the best ones are colored with purple potato and have a slightly sweet, molasses-y taste.

Making bubble tea at home has been a dream for a long time, since Ariel and I found a fantastic bubble tea shop in Seattle that uses real fruits for the smoothies instead of the more common flavored powders. It's called WOW, which stands for Wonder Of Worship, and is an Asian Christian hangout and board game den in addition to its bubble tea vending.

There's nothing like that within comfortable driving distance of us here in Stoneham. So, in case you're in the same boat, here's a bubble tea recipe. You can also just leave the bubbles out and have a smoothie.

Ingredients (per smoothie):
1 small ripe avocado
Milk, or milk alternative if dairy intolerant - I suggest coconut-almond milk
Sweetener to taste
3 drops vanilla extract, or more to taste
Ice cubes (optional)

Slice the avocado in half down to the pit. Twist the two halves apart and pop the pit out with a spoon; discard the pit. Hold each half in your hand and, using a blunt knife, slice the inner meat vertically and horizontally. Then scoop the meat out with a spoon. It will come out already nicely chopped.

Put the avocado meat into a small mixing bowl if you have an immersion blender, also known as a stick blender. If you don't have one, put it into the regular blender, and afterwards, go get an immersion blender ;) Add enough milk to just cover the avocado. You may need to add more later. Avocados are remarkably powerful thickeners.

Add a little sweetener. You can use any kind of sweetener, either natural or artificial. If you want to use natural, then I suggest half honey and half organic sugar. About a teaspoon of each to start with, you can always add more. Also add the vanilla.

Puree the mixture until smooth. You will be amazed at how velvety smooth the avocado makes it. Taste and add more sweetener if needed.

Next, either put in the fridge to chill, or add a few ice cubes and stir until it's at your desired temperature.

To make the bobas:
You will need to buy the right ones. Go online to Amazon and order the kind specially made for bubble tea. If you try to use regular tapioca, you will be disappointed! (Obviously, you will need to do this well in advance of making the smoothie!) Then, follow the directions to cook them. When they're done cooking, drain in a strainer, and put into a bowl of ice water to chill before adding them to your smoothie.

To drink a bubble tea, you will either need a jumbo bubble tea straw that is big enough to suck up the bobas, or you will need to use a spoon. Enjoy!

Monday, April 16, 2012

Delicious Blueberry Compote-slash-Syrup

This is great on pancakes, ice cream, angel cake, and as a topping to spice up less flavorful fruits like cantaloupe.

It is an excellent way to use frozen berries, which are much cheaper than fresh, and available year-round. They may also be more nutritious, since they haven't been sitting on a shelf, but instead were frozen and preserved right after being picked.


Ingredients:
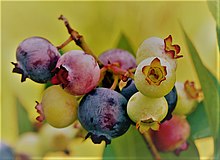
1 bag frozen wild blueberries (about a pound)
1/4 tsp cinnamon
Sweetener to taste
Optional: Lemon zest, OR orange zest, OR 1/4 tsp orange oil

Place the blueberries and the cinnamon in a small pot over medium heat. No need to thaw the berries first. Cook and stir.

The berries will burst and give up a lot of juice. As long as you keep stirring, the berry syrup will become thicker and thicker. There is a "sweet spot" where the berry syrup has become concentrated and intensely flavorful, but hasn't become too thick or gritty from the seeds. Exactly how thick is up to you. Just keep spooning some out and looking at it. You will know when it's done because you will look at it and say "I wanna put that on my ice cream." (When it's too thin, you will look at it and say "Ick, that looks watery.")

Take it off the stove and add the sweetener at this time. It doesn't matter what kind you use, but do make sure it has cooled before you add nutrasweet (phenylalanine) if that's what you use. The flavor of the berries is strong enough to cover up the flavor of stevia if you choose to use it. How much you need will depend on the sweetness of the berries, which varies from bag to bag. Start with 1/4 cup (or equivalent) and taste.

If you chose to use the zest or flavoring, add it now.

NEXT: Some people like this as a compote, which means there are whole berries floating in a relatively thin syrup, while other people like it better as a thick syrup with no chunks, ie. a smooth puree. I like puree, Ariel likes chunks, so I puree half of it and then store the results in separate jars.

Note that this syrup is different from store-bought in that it has no preservatives. This will keep for only 2-3 days in the fridge. If you want it to keep for longer, then take it out every day or two and bring it to a boil, then cool and return to the fridge. Every time you boil it, you stop the bacteria and yeast from growing, and reset the shelf life.

WHY AND WHEREFORE:

Why wild blueberries? They are higher in antioxidants and have a stronger flavor, and are a little more tart, which I like. They are also a little more expensive, so feel free to use regular blueberries if the wild ones are too pricey.

Why cinnamon and citrus? That's just the traditional "berry cobbler" combo. You can also use 1/4 - 1/2 tsp almond flavoring, which is sophisticated and a nice treat. Also, you can include other berries, such as blackberries, to make a more complex flavor. Ginger and lemon is another fun twist. I haven't tried it, but I have seen fruit recipes that use 1/4 cup of zinfandel wine, too.

Wednesday, March 14, 2012

Thickening Sauces

Sauces are jewelry of the kitchen wardrobe. But a sauce isn't usually very useful unless it is thick enough to cling to the food, and so it is necessary to thicken most sauces in some way. Here's a rundown of ways to do this, and keep in mind it works to thicken other things, too.

1. Starch powder: The most obvious method is to use a powdered starch like flour. Cornstarch, arrowroot, and tapioca all work, too, the main difference being that flour is cloudy whereas those other three are clear.

To thicken with starch, you must whisk the starch into a cool liquid, you cannot whisk it into a hot liquid or it will clump.

Alternatively, you can make a paste (also called a roux) using the flour and a small amount of either melted fat or water, and gradually, carefully whisk the rest of the liquid in a bit at a time. This is ideal when you want to cook the flour a little to make it develop flavor, but is not recommended for other starches.

One last way to incorporate it is to sprinkle it atop dry vegetables or meats while they are sauteeing. The flour clings to the veggies instead of clumping, and you can add the rest of the liquid all at once without worry.

Advantages: Readily available, foolproof if you follow directions
Disadvantages: Adds little or no flavor, adds carbs
Additional properties: Flour-thickened sauces get thicker as they cool, but cornstarch-thickened sauces tend to get thinner. Very stable once cooked and won't curdle, but might scorch.

2. Egg: Eggs, either whole or just the yolk, thicken any liquid into a rich and silky custard. The obvious use is for ice cream and custard sauce, but eggs can also be used to thicken mustard sauce and wine sauce to excellent effect.

The big problem is overcooking and curdling. Avoid this by heating the liquid to a boil, and then gradually whisking the liquid into the eggs (in a separate bowl), not the other way around. If necessary, return to the heat and cook a little longer, but stop instantly if the liquid begins to look clumpy. To rescue a clumpy sauce, put it into the blender and puree. It will be thinner but the clumps will go away.

Advantages: Delicious flavor and richness, adds nutrition
Disadvantages: Adds fat and cholesterol, adds allergens (eggs are allergenic), easy to mess up
Additional properties: Tends to gel slightly while it cools. Unstable, may curdle easily.

3. Onions: Onions will cook down into a pulp when simmered for a long time. This is most useful in stews. Use enough onions, and you will not need to thicken your stew with flour at all; it will make a delicious thick broth on its own.

Advantages: Extremely flavorful, healthy (it's a veggie!), non-allergenic for most people
Disadvantages: Takes a long time, not practical for anything but stew and tagine
Additional properties: Very stable. Won't curdle or change texture.

4. Pureed vegetables: Many cooked veggies can be pureed and added to sauces, or used as a sauce. The best are carrots, cauliflower, potatoes, and coconut milk (which is pureed coconut).

Saturday, February 25, 2012

Brown Rice Pudding with Brandy

Out of the blue, I acquired a craving for rice pudding. I insisted on brown rice for health purposes.

I've read that it's better to pre-cook the brown rice in water and then add it to the milk; I haven't tried this yet, so here's the traditional recipe.

Ingredients:
2/3 cup brown rice, uncooked
Optional: 1/4 cup golden raisins
3 cups milk
1/4 tsp cinnamon
1/4 tsp fresh ground nutmeg
3 tbsp butter or margarine
1 tbsp brandy
1 tsp vanilla
1/2 cup splenda or equivalent sweetness

Combine the rice, milk, cinnamon, and nutmeg in a small pot. Bring to a low boil, then turn down the heat and simmer gently. Cook, stirring frequently, for 45-60 minutes or until the pudding thickens to your preferred texture.

Add the brandy. Whisk in the butter, a tablespoon at a time. Then continue to cook, stirring constantly since it will burn easily at this point, until the alcohol from the brandy has evaporated. You can tell because the steam will stop smelling like booze.

Stir in the splenda and vanilla.

If you don't serve it immediately, this will thicken as it cools. It will also acquire a skin. To prevent this, place a sheet of plastic wrap directly onto the surface of the pudding.

Note on butter: The reason for the butter and the brandy is to cover up the bitter bite of the brown rice. I personally don't like the taste of brown rice on its own. The fat from the butter tempers bitterness, and whatever shines through anyway is swallowed up by the brandy. Spiced rum would also be tasty. I made this with 2% milk, so it's possible that using whole milk would not need butter.

Note on milk: You cannot substitute rice, almond, or soy milk effectively in this recipe. Soy milk will produce a runny pudding, though still edible; rice milk will not set at all but stay liquid like congee. I think, however, that the newly available coconut milk (not the kind in a can, the kind you buy in the milk department) might work well.

Next, I think I'll try this with wheat berries, or maybe farro!

Sunday, February 19, 2012

Kabocha Squash Pie

I made this without a crust, so it's more like a flan than a pie, but you can make it with a crust. I recommend this crust: Flaky Tender Pie Crust

Kabocha squash is also known as a Japanese pumpkin. It doesn't look like a pumpkin, since it's green and flattened instead of round, but its flesh is orange and very smooth and sweet. In my opinion, kabocha is better than pumpkin if you are preparing a pumpkin recipe from a fresh vegetable instead of canned puree. Fresh pumpkins are irregular and often underripe, watery, or stringy; kabocha squashes are almost always sweet and fine-textured, and taste very similar to pumpkin. This is a Pumpkin pie recipe at heart.

Ingredients:
1 kabocha squash

Wikipedia kabocha squash
Kabocha squash

3 eggs
1 can evaporated milk
2/3 cup Splenda or equivalent sweetness
1 tbsp dark corn syrup (optional if you don't have it)
1 tsp cinnamon
1/2 tsp allspice
1 tsp vanilla

To prepare the squash, cut it in half from top to bottom, and scoop out the seeds and guts with a large metal spoon. (Metal so that the hard edges can scrape it out.) Place cut-side-down on a baking sheet or plate, and roast at 400 until it's very tender, about 45 minutes but don't skimp - it won't overcook.

Turn the oven down to 325 and remove the squash. Scoop out the orange flesh and put in a large bowl. If there is a greenish, less-ripe layer under the skin of the squash, don't use it. Usually there is more than enough meat on one of these squashes that you can afford to be picky.

Add all the remaining ingredients and beat well with a spoon. If you have an immersion blender, this is a good time to use it. Don't use a food processor or blender, though, since that whips in too much air.

Spray a pie plate with cooking spray or rub with butter. Pour the filling into the pie plate and put in the oven. Cook for 30 minutes or until the filling is set. If it puffs up, you've overcooked it so take it out right away. It might be a little watery but it will still be very delicious so don't worry.

This can also be made with less seasoning and no Splenda, for a side dish you can serve at dinner instead of for dessert. It's delicious, easy and healthy.

Friday, June 3, 2011

Hot Fudge Sauce

Why the heck can't anyone make a sugar free fudge sauce worth eating?? Everything on the market tastes like licking the floor in the Dow chemical factory. I have my own incredibly simple, no-cook recipe. This does not keep in the fridge, so make the amount you plan to eat right then.

Ingredients (for 2-4 servings depending how much sauce you want)
1 ounce baking chocolate (Ghirardhelli is the best, but regular Bakers brand is fine)
4 packets Truvia brand stevia sweetener or equivalent sweetness
2 tbsp milk (low fat or skim is fine)
1/2 tsp vanilla

Chop the chocolate and pour the small pieces into a microwave-safe cup or small bowl. Add the sweetener and 1 tbsp milk, and microwave for 15 seconds.

Attempt to stir the sauce. If the chocolate isn't melted enough, microwave longer, 5 seconds at a time, until it's all melted. This will depend on the power of your machine.

When it melts, stir very thoroughly with a whisk or a fork. Gradually add the remaining milk and the vanilla and stir very thoroughly. If you want to thin it at this point, you can, using tiny amounts of milk at a time. If it gets too thin, let it cool in the fridge, and it will thicken.

If you want it to be hot, serve it promptly. But if you're going to put this on ice cream, you should cool it somewhat first. Put it in the fridge while the ice cream is making, or approximately 20 minutes. When it's cooled, it will be thicker, so you might want to add more milk, a teaspoon at a time, until it reaches the desired consistency.

Again, don't keep this in the fridge. The milk will dry out and form a crust. If you do want to store it, it would keep without spoiling for 2 days, as long as you get a piece of plastic wrap and press it down over the surface of the sauce, so there's no air on the sauce that might cause the milk to dry and form a crust.

I think you will agree that this sauce is incredible.

Note: If you're really intensely watching your calories, it is also possible to make it using cocoa powder, which reduces saturated fat content considerably. To do this, start with 1/4 cup cocoa powder and add the milk very very slowly to form a paste. The sauce will go from too thick to just right to too thin with the addition of just a few too many drops of milk, so go slowly. If you make it too thin, you can't fix it by cooling it, either - the cocoa won't thicken, unlike the chocolate. I find this harder to make and I like the fudginess of the chocolate, but it's a very nice option for dieters to have something sweet and decadent without breaking the calorie budget. It can also be quite high in fiber depending on the brand of cocoa used.

Friday, November 26, 2010

Pumpkin Cheesecake

Ariel requested a cheesecake for Thanksgiving, and of course that meant I had to put pumpkin in it. This is a reduced-sugar version of this recipe by Cooking Light, and can be made wholly sugar-free by simply omitting the crust. It'd be good without the crust, I only add it for the benefit of guests who expect crusts.

Pumpkin cheesecake

Ingredients:

50 vanilla wafer cookies
2 tbsp butter or margarine
4 blocks 1/3 reduced fat cream cheese
1 can pumpkin
1 1/4 cup Splenda
1 1/2 tsp cinnamon
2/3 tsp ground ginger
1/2 tsp allspice
1/4 tsp cloves
2 tsp vanilla
4 eggs
1 tbsp molasses

Crush the wafers - a food processor is good for this, but you can also crush them with a rolling pin inside a plastic bag. Melt the butter and mix it into the crumbs, then spread the crumbs in the bottom of either a springform pan or a silicone cake pan at least 3 inches deep. Pat the crumbs down and bake at 400 for 8 minutes.

Combine the Splenda and the spices in a small bowl, stirring with a whisk. Put the cream cheeses into a large microwave-safe bowl and warm up in the microwave, 10 seconds at a time, until they are easy to stir. Stir in the pumpkin, the vanilla, and the eggs, followed by the Splenda mixture.

Important note about stirring: If you beat air into a cheesecake, it will puff up and curdle when you bake it and you won't be happy with the results. Stirring must be done with care to avoid this. I don't use a machine - a food processor is wildly inappropriate for this, and a mixer gives (heh heh) mixed results. Use a spoon and be careful, or use my special cheesecake secret: An immersion blender! You can stick the immersion blender into the batter, carefully to avoid trapping bubbles, and then stir the batter with the blending stick (while blending) and as long as you don't lift the stick up too high, it won't whip any air in and you'll have a perfectly smooth batter.

Pour the batter into the prepared pan, and bake at 350 for 10 minutes. Then turn the oven down and bake at 300 for 50 minutes. The cheesecake is done when the outer inch or two is beginning to turn golden and puff slightly, but the inside is flat. Cracks are okay, they happen to everyone and no one will care because it tastes AMAZING.

Wednesday, October 13, 2010

Lasagna Noodles: Also Just Suggestions

As I've mentioned before, lasagna is delicious. It's also pretty healthy, if you use the reduced fat cheeses, and can be made more healthy by adding veggies like spinach to the fillings, and by substituting other things for the woeful noodles.

Yes, the noodles are a problem. Nothing ruins your wholesome cheesy protein-and-calcium-packed dinner like a big ol' wad of refined flour! Here's some great alternatives to those loathsome noodles:

  1. Whole wheat noodles: Duh. This is a great time to use whole wheat, though, because the flavorful fillings blend well with any unpleasant aftertaste of the whole wheat, and the chewier texture works well for the noodles' role as a structural element. This is the amateur solution, though.
  2. Tofu noodles: CRAZINESS! But it works. It's highly labor-intensive, but produces a fairly tasty and noodly lasagna, with all the health benefits of soy.
  3. Eggplant slices: My exciting new discovery! Like eggplant Parmesan, except without the deep-friend crust. Delicious, fresh-tasting and affordable, as well as lower in calories than any other option, enabling you to have MORE of it!
  4. Whatever else you can think of: Seriously, go buck wild. Lasagna is peasant food, which means there's no sense standing on ceremony: If it slices, it goes. Try slices of tomatoes or zucchini, or if you want to get really crazy, prosciutto or pepperoni!

If you're curious about the tofu noodles, here's a recipe:

1 block extra-firm tofu

Slice the tofu very thinly, about 1/8 inch each. Using a hollow-edge santoku knife helps make it easier to work with the slices, without tearing them. Lay them on an oiled baking sheet, and bake at 300 for about 15 minutes or until they are "al dente" the way a lasagna noodle should be. Then use them exactly like a noodle. This makes enough for three layers; if you like a many-layered lasagna, use two blocks of tofu.

Incidentally, pre-baking tofu is a good idea in a lot of situations, producing a more toothsome, chewy texture.

And here's how to use eggplant slices:

1 large eggplant
Salt

Peel the eggplant, and slice lengthwise (NOT crosswise, the slices go to long way) into 1/4 inch slices. Lay the slices out and sprinkle liberally with salt. Turn over and sprinkle the other side. Then stack them up in a colander and let sit for a while. An hour is plenty of time.

This process pulls the bitter juices out of the eggplant. After they have sat, remove the slices and rinse off the bitter juices in the sink. (You probably could also do this by soaking them in salted water, I just haven't tried it yet.)

Brush the slices with olive oil, and roast in the oven at 400 for 10 minutes, or until tender and golden at the edges. If you leave off the olive oil, they might be tough, so be warned.

Now you can use them like a normal noodle. Yay!

As far as the rest of the recipe goes? It's not exactly rocket surgery. Lasagna has four elements: Soft cheese filling, tomato sauce, shreded cheese, and "noodles" (whatever layerable thing you are using, noodle or no).

My soft cheese filling is usually three cups of ricotta, 2 eggs, some parmesan cheese, and a teaspoon of oregano. You could also use parsley and/or basil, and you can add garlic if you like. An easy addition is to thaw a package of frozen chopping spinach, squeeze out the water, and toss the leaves into the filling.

Then I use plain mozzarella for the shredded cheese layers, but also sometimes I use Sargento's reduced fat Italian cheese blend, which is quite good. Their Pizza Cheese and Italian Herd And Cheese Bistro Blends are good, too.

For tomato sauce, well... You'll laugh, but I find that the cheaper tomato sauce that comes in a can is better than the glass jarred sauces, with the exception of the very expensive ones Emeril makes. I suspect that the ordinary jarred sauce is damaged by the exposure to light, and Emeril's probably is, too, but the original recipe is so much superior that it's still good despite this. I wish they sold tomato sauce in dark glass!

Well, there you have it: Lasagna.

If you want to try something more special, here's my favorite "alternate lasagna" recipe: Creamy Spinach Lasagna with whole wheat noodles, by Cooking Light.

To make that recipe, you will want to add parmesan or romano cheese to the creamy filling, as well as some finely chopped onion and minced garlic, and some of your favorite herbs, such as basil. Otherwise, the filling is bland. With those additions, though, this is a luxuriously silky lasagna that is great for company, because it uses "normal" whole wheat noodles, and in such a way that the whole wheat flavor is actually a part of the recipe, not an unfortunate side effect.

Sunday, October 10, 2010

Pumpkin Flan

There's a delicious recipe for butternut flan in Cookling Light, but it has serious flaws. Butternut squash, though delicious, is annoying to process, and the recipe produces a watery, bland result when followed exactly (reviewers agree).

I have a different version made with canned pumpkin. You might use fresh pumpkin, but I don't, not for pies: Fresh pumpkin is an unpredictable product, sometimes stringy and watery, sometimes picked unripe and allowed to turn orange off the vine, resulting in a flavorless result. But the biggest issue is the irregular moisture content.

Canned pumpkin has a good and predictable flavor, a low moisture content, and is very easy to use. The disadvantage is the slight "canned" flavor, which is not noticable in a highly spiced recipe, but unpleasant (to me) in a recipe where the flavor of the pumpkin is the dominant flavor, like pumpkin soup.

Thus, I use canned for pies and breads/muffins/cookies/etc., and fresh for soups and anytime I intend to use it as cubes instead of puree.

But all this is beside the point. The pumpkin flan is essentially a pumpkin pie, but instead of a crust, it has caramel flan sauce on the bottom! The filling can be made with Splenda (custards are one of the best times to use artificial sweeteners), and with no crust, there's no white flour or butter, so the end result consists mostly of wholesome milk, eggs, and pumpkin.

Filling:

1 can unsweetened plain pumpkin puree (NOT pumpkin pie filling)
1 5-ounce can evaporated milk
1/2 cup milk
2/3 cup Splenda or equivalent
1 tsp vanilla
1 tsp cinnamon
1/2 tsp ground ginger
1/4 tsp nutmeg
1/4 tsp cloves or allspice
3 eggs
1 egg yolk

Sauce:

1/3 cup sugar (raw sugar is okay)
1 tsp corn syrup (you can leave it out if you don't have any)
3 tbsp water

Coat 6 custard cups (ramekins) with butter or cooking spray. Preheat the oven to 325. Place 6 cups of water on the back burner and let it heat up while you're working.

Make the caramel sauce by putting the ingredients into a small pan, ideally stainless steel or heavy anodized aluminum, and stirring over medium heat until it melts together. Then leave it to boil, NOT stirring, until it turns golden. Then, immediately pour the hot sugar into the ramekins, working quickly because it will harden and become unusable if it cools. Fill the pot with water once you're done, and leave it to soak so it will be easy to clean later.

Combine the filling ingredients in a bowl and stir well. Don't mix air into it - that means be careful if you use a whisk, and don't use an electric mixer or blender. If you have an immersion blender, however, this is a great time to use it, provided you insert the blender carefully and keep it under the surface to avoid whipping air in. The reason to avoid stirring in air is because if you do, the filling will puff up and have an odd texture.

Place the ramekins onto a jelly-roll pan (baking sheet with a lip around the edges, as opposed to the kind that is totally flat) and pour the filling into them. Then place the pan into the oven. THEN, carefully pour the hot water you've been boiling into the pan, so that the ramekins are sitting in the hot water. Depending on the size of your pan, you might have to add more water; you want it to be almost full, such that the ramekins are sitting in water about halfway up their sides.

Bake for 25 minutes, then open the oven. Remove the ramekins carefully, putting them on a cooling rack, and leave the hot water in the oven until it's cooled off and is safe to remove. Don't try to take the whole pan out at once! It will spill and you might burn yourself!


Weird things I did and why:

1. Why some whole eggs and some yolks? An authentic flan is made with all yolks, but that's pretty rich and unhealthy, and then I never know what to do with the whites. But you can make it with 6 yolks instead if you like.

2. Can I make this non-dairy? Yes. Replace the evaporated milk with plain non-dairy liquid creamer, and replace the regular milk with your favorite milk substitute.

Cuisinart immersion blender
3. Why the immersion blender? I love my immersion blender. It is easy to use and easy to clean. It's good for custards because it will blend up the albumen (egg white stringy bits) so the custard has an even texture, without whipping air into it. Just slip the blender in carefully to avoid trapping air, and turn it on, keeping the head underwater. I also use this for mixing cheesecake batter for the same reason. Air bubbles are the enemy of cheesecake.

You can serve the flan by upending it over a plate, but I find that difficult, so I just eat it out of the ramekin. Yum!

Tuesday, September 28, 2010

Artificial Sweeteners

"ZOMG Artificial Sweeteners r gonna kill u!!!"

I get this a lot. My usual response is threefold:

1. Anything will kill you in excess.
2. Studies have tried and failed to link moderate use of Splenda to health problems, whereas
3. We know for a fact that sugar WILL kill you. Even in moderation it does harm, which requires immediate action to prevent (specifically, cleaning your teeth ASAP).

"But what about honey? What about raw sugar? What about fructose?" I hear you ask! Well, they are all the same. Sugar is sugar is sugar. High fructose corn syrup is currently being demonized, but seriously, folks, it's just sugar. If it's slightly less healthy than regular sugar, that's like saying hitting yourself with a mallet hurts less than hitting yourself with a hammer. They both hurt.

That said, I do prefer to use raw sugar and honey, but that's because white sugar sometimes triggers migraines in my family (we don't know why). Also, I just like the flavor!

I still use sucralose (Splenda) as my go-to sweetener for most things, but only for budgetary considerations. The exception is when I am cooking something chocolate flavored, I will often use Truvia, because its taste goes really well with chocolate for some reason. As more varieties of natural sweeteners enter the market, I play with them and develop preferences, and have incorporated some into my regular use. Here's a breakdown of the ones I've tried.

  1. Stevia - a natural plant extract. Now available in many forms. Interestingly, it was banned for some time, and still is banned in some parts of the world. I wasn't able to find out a good reason for this, though, and it's now sanctioned by our government. Rebiana (Reb A) is the specific word for the extract used by PureVia and Truvia. It's used in some parts of the world as a treatment for diabetes, and some studies do show an increase in insulin sensitivity and production; someday, we might be using stevia as a medicine. Until then, it's a sweetener.
    • Truvia: The best Stevia I've tried, sold in both packet and loose form as stevia extract in a base of erythritol (discussed below). Made by the Coca-Cola Company. I use this in recipes calling for chocolate, because something about it makes chocolate taste more chocolatey, which is always a good thing.
    • PureVia: The same thing, but has a more bitter taste. Made by the Pepsi Company.
    • Stevia in the Raw: Trading on their Sugar in the Raw brand, this is stevia in a base of maltodextrin, a common food starch. The maltodextrin annoys me. If I'm going to eat maltodextrin, I will just get Splenda. Furthermore, this has a strong bitter taste that has ruined more than one dessert for me.
  2. Sucralose - Splenda's sweetener, now available in generic form. Safe except linked to thyroid problems (among others) in rodents at massive doses. Thyroid problems are treatable and the symptoms are obvious, and in order to trigger this problem, you'd have to, for example, drink two DOZEN cans of Splenda-sweetened sodas PER DAY for weeks, in order to even come close to the doses given to those rats. I consider Splenda to be safe and affordable. It's sold in a base of food starches to make it fluffy, which contributes some calories and makes it dissolve into liquids a bit unpredictably, but this is a minor issue.
  3. Aspartame - Originally marketed as Equal. Whether by virtue of its older age, or by actual dangers, aspartame has had more potential problems linked with it. I have a major weakness for diet soda, and that's made with aspartame, so I never use aspartame in other forms in order to keep my consumption moderate. UPDATE: I poked around looking at some more research, and the FDA says I can drink 21 cans of soda a day for the rest of my life and the aspartame won't hurt me (which is not to say it's a good idea!). There's still a surprising amount of controversy over it, though, and its presence in the "safe foods" list is by a non-unanimous vote.
  4. Saccharine - I think this tastes nasty and never use it. Maybe it's unhealthy, I don't know. Either way, it's gross.
  5. Sugar alcohols - carbohydrates that taste like sugar but are metabolized so slowly as to have a negligible effect on blood sugar, making them safe for diabetics. There are many kinds of sugar alcohols which have different properties. Almost all of them are naturally produced in plants or even in the human body.
    • Maltitol: Used in candy-making for its gooiness, but difficult to digest. It causes all kinds of intestinal distress in high doses, and for many, a "high dose" is, say, two bites of candy. The cause is the same as beans, meaning some people don't digest it well (which is kind of the point, since the idea is to digest these slowly and avoid the sugar rush). Sorbitol is very similar.
    • Erythritol: Metabolized and excreted through the renal system, meaning you pee it out. Thus, no intestinal problems. It's a good solution for people like my husband who can't tolerate maltitol. However, the idea of peeing sweetly weirds me out, and I prefer not to use too much of this in case it turns out someday that it's not good for your kidneys. There's no evidence causing me to think that, it's just my hangup.
    • Xylitol: My favorite of all. Xylitol has been linked to major health benefits (yes! Healthy sweetness!) for our mouths, preventing dental decay and the passing of dental bacteria from mothers to babies. Chewing gum with xylitol is great for your teeth. Nobody knows why (or they didn't last I checked) but the theory is that the bacteria think it's sugar and try to eat it, then can't flourish because (HA!) it's not really sugar after all. Xylitol has also been used to combat fungal infections and as a systemic antibiotic for various infections. But there is one massive drawback. Xylitol is extremely toxic to dogs. Some dogs tolerate it well, but some will die after eating two sticks of xylitol gum. The reaction is not a conventional toxicity like chocolate, but rather an autoimmune response like a peanut allergy, hence the unpredictability of it. The emergency room visit and the followup vet bills after Trinity got into some xylitol have convinced me to only keep this around in small quantities and be VERY VERY careful to keep it WELL out of her reach.
  6. Ideal Brand: The name is silly, but actually it kind of IS ideal. It's xylitol intensified with sucralose, to make it more affordable. This is available in many grocery stores, albeit in small amounts and not for the best price. Still, I keep it around and use it to sweeten drinks like tea and chocolate milk, figuring this maximizes the health benefits of the xylitol. The fact that it comes in paper packets means it's safer from Trinity, too, since I use it one packet at a time instead of putting into whole recipes.

Well, there you have it. I hope that helps. At the moment, nobody is reading this blog but me and possibly my mom, so I have not bothered to cite sources and write a bibliography. Someday when I am rich and famous and it's worth my time to do so, I'll come back here and write something more detailed for y'all.

Enjoy the sweet life, people!

Monday, September 13, 2010

Chicken Pot Pie, better than store-bought

I have been on a quest for chicken pot pie for as long as I've been cooking, and it's always elusive. Until now. A big part of the secret is the little white onions, so be sure not to substitute them!

Filling:

1 cup frozen peas
4 carrots or about enough to make 3/4 cup when chopped
1 cup little white boiling onions, about 6 - golf-ball-sized ones are okay - cut in half, no need to peel
1/2 tsp chopped fresh thyme
1/4 tsp chopped fresh sage
1 cup milk
1/4 cup flour
1 tsp chicken bouillon (enough to make 1 cup of broth)
Ground pepper to taste
Breast meat from 1 rotisserie chicken, chopped

Topping:

1 1/2 cups whole wheat flour
1/2 cups cornstarch (that combo means the health of the whole wheat plus the lightness of the cornstarch)
1 stick butter
1/4 tsp salt
1/2 tsp cream or tartar
1/2 tsp baking powder
2/3 cup milk

Prep:

Oven to 450. Place 2 cups of water in a small pot to boil. Drop in the onions.

Make the topping first. Combine the dry ingredients and then cut in the butter with a pastry cutter or two butter knives, whichever you have, until it's crumbles with a few bits the size of peas (it's all about peas tonight, folks). Then add the milk, stir just until a dough forms. Turn out onto a floured surface and knead 10 times.

Roll out into the right shape to fit your casserole or pie plate that you plan to use. Turn the dish upside-down on top of it and trim it to fit - you want it pretty exact. Then put the crust on a cookie sheet, and put the cookie sheet in the oven to bake. Set the timer for 14 minutes.

By now the water is boiling, so put the peas in while you chop the carrots - try to get the pieces not much bigger than the peas. After four minutes, scoop the peas and onions out with a slotted spoon and drop in the carrots. Put the peas into the casserole dish.

While the carrots cook (set a timer for 8 minutes), peel and chop the onions. They don't need to be chopped very small. The reason you cook them first is because otherwise the peels are annoying to remove. Also chop the chicken and put it in the casserole dish.

Put the chopped onions into a skillet with the milk, bouillon, and flour. Whisk the flour until smooth and turn on the heat. Whisk constantly while it warms up.

By now the crust is probably ready to check and the carrots are probably ready, too. If the crust is golden, remove it and set it aside; otherwise, give it another 2 minutes. Put the carrots into the casserole dish, and add 2/3 cup of the cooking water (which is now a tasty broth) to the milk mixture in the skillet.

When the milk mixture thickens and bubbles, remove it from the heat and pour it into the casserole dish. Add the herbs. By now, all the filling ingredients should be in the casserole dish. Just mix them together.

Gently remove the crust from the baking sheet and place on top of the pie.

You're done!

Here's the "why" for some of the weird things I did in this recipe:

Why the annoying little onions? No idea, but their flavor is necessary. Yellow or large white onions just don't cut it. Sorry! Boiling them first makes it easier, and they don't sting your eyes either.

Why bake the crust separately? Maybe this is just me, but I can't ever keep the filling from bubbling over the crust and making it soggy if I bake the crust on top of the pie. Also, this way shaves a good 15 minutes off the prep time.

Why THIS crust and not a pie crust? It's healthier this way. Less butter, but still homey. It's a biscuit recipe. You could use Bisquick or even refrigerated biscuit dough if you like.

Why bouillon and not broth? Because this way you can use milk as some of the liquid, lending creaminess and richness to the gravy without all the added fat that would come from the butter and/or cream one would normally have to use to get that same effect.

Why all the micro-managing? I don't need you to tell me how to chop my own dam carrots! Because if you do it just like I say, you can have homemade chicken pot pie on the table in half an hour. That's a pretty impressive achievement. But by all means, feel free to prepare it in whatever order you prefer.

Why rotisserie chicken? Because it is delicious.

Like I said, this is the result of a lot of trial and error. To my taste it is a damned near perfect (pardon my French) combination of authentic and delicious homestyle flavor together with modern healthful cooking. The only problem is the butter. You could use vegetable shortening, but you'd have to add more salt. You can also cut the biscuit recipe in half and have a thinner crust.